Summary
In this post I
– Discussed lightbox and food photography, following a short YouTube tutorial from Doug McKinlay
– Explored the details of his shoot set-up, camera settings and lighting choices
– Suggested the differences I would make if I were shooting this project and the type of subjects that can be used
– Before briefly analysing a screenshot of his work from the lightbox shoot.
– Researched the concept of MRI’s scans and the use of fruit and vegetable cross-sections
– Discussed the idea behind Andy Ellison’s scans and why he did them
– Explained the similarities between MRI’s and negative film, what they pick up and the differences we can find
– With a brief analysis of Ellison’s work and the contrasts between the two.
– Explored the technical approach for symmetrical and asymmetrical images, the balance and elements that make them what they are.
– While referencing a past project I did in 2013 and analysing an image from it to explain my understanding of the technique.
– Provided bullet points for my shoot plan for this assignment and a reflection on this post as a whole
– What it taught me and what I’d like to implement in my work.
Lightbox and food photography
Following my techniques research where I looked at macro, abstract photography and lumen prints, I decided to focus on lightbox photography and using a macro lens to explore my chosen subject in a more intimate, up close and personal way.
Doug McKinlay, a UK based photographer released a short YouTube tutorial in March of 2017, exploring lightbox art and ways to achieve some impressive shots from the comfort of your home. McKinlay’s set-up consisted of a large lightbox, placed on a few stools to avoid the camera being too close to the subjects, in turn causing the macro lens to struggle with focus. He gathered a variety of fruit and veg, sliced them into thin pieces and arranged them in a way that he felt was great for a strong composition. Using transparent or translucent items are ideal for this project, as light can pass through and highlight the details, rather than blocking light and becoming solid shapes.
McKinlay decided to set the aperture on his camera to F/8 allowing the depth of field to be even across the frame, however, suggested if the shutter speed isn’t high enough to shoot handheld then boost the ISO slightly without causing too much grain. I would use a tripod to steady the camera if the aperture was slightly wider and the shutter speed too slow to avoid handheld motion blur. Another tip that was suggested was overexposing by 1 or 2 stops, to avoid the camera light meter from turning the bright white light into a duller grey (McKinlay, 2017).
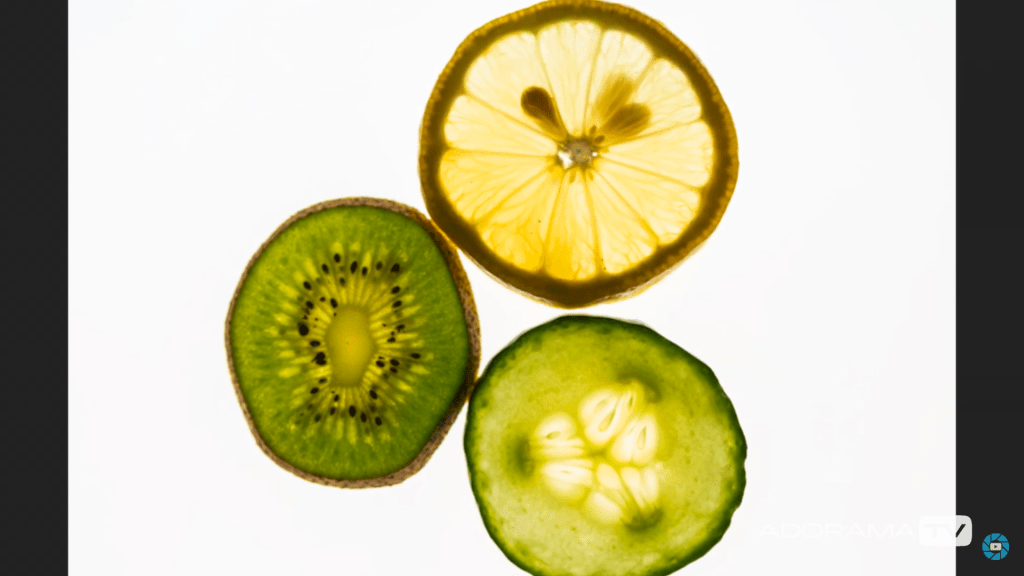
Depending on what you decide to photograph, their makeup and the thickness will influence the end product in a variety of ways, as can be seen in the screenshot I took from McKinlay’s tutorial (see Fig.1). The denser areas are darker and lack texture, whereas the thinner, more translucent elements of the fruit are lighter and full of texture, detail and colour. Being able to capture the tiny details and structure of the subject is fascinating, as it allows you to appreciate what it is made up of, how it holds itself together and what it might feel like if you weren’t already aware. In terms of composition, this isn’t my favourite as the layout isn’t the most exciting, however, the cold citrus colours and asymmetric segments, seeds and shapes make up for quite a simple subject placement. Overexposing the shot helped the background be crisp and white, preventing the background from looking dull and affecting the fruit slices as a result.
If I were doing this project, I would get closer to the subject, focus on the smaller details within the frame rather than the slices as a whole. Exploring the areas we don’t normally look at in much detail, removing context from the composition by cropping out some familiar elements with the lens, may encourage the viewer to appreciate what they are viewing for a little while longer.
MRI’s on fruit and veg research
Andy Ellison is an MRI technician at Boston University Medical School, who has produced multiple scans of the cross-sections of fruit and vegetables, following an MRI machine settings test with an orange slice (Insider, 2013). While fruit and vegetables aren’t at risk of tumours or bleed as a brain maybe, they’re still complex, held together by their fibres and flesh much like the human body. Lemons, for example, are made up of segments and have little fleshy pockets of juice within, while human skin is made up of cells that are all connected to create many thin layers to protect us.
Ellison’s scans are beautiful, ghostly and look like they could be part of the human body which wonderful to see how incredible nature is and the patterns that can be found within something that has grown from a tiny seed.
Much like photographic negatives, MRI’s I’ve briefly googled, tend to show the thicker areas that are blocking out most of the light or rays via a white or light grey image, while the more exposed areas show up as dark grey or black. Some scans may vary and present the denser areas in black or grey, while the emptier or thinner areas are represented with light grey or white, similar to a developed film print.
As seen in the scan of the pomegranate (see Fig. 2) the fleshier, cell-like seeds are bright white, while the thicker skin is grey. The shape of the fruit is asymmetric, defined, full of texture and detailed around the outer edges especially. Heavy shadows within the translucent seeds imply that there is a small yet thicker seed or pip inside. Removing colour allows the viewer to come up with their conclusion as to what is in front of them.
The MRI of the melon is the complete opposite (See Fig. 3) as the tougher, opaque part of the fruit is a lighter white whereas the transparent seeds in the middle remain dark black to imply overexposure. There are tiny veins that can be seen if you look at this photograph closely, something that makes the composition more exciting as the details are subtle, allowing the eyes to look further. The middle section of the melon seems to reflect itself too which may be an interesting concept to look into.
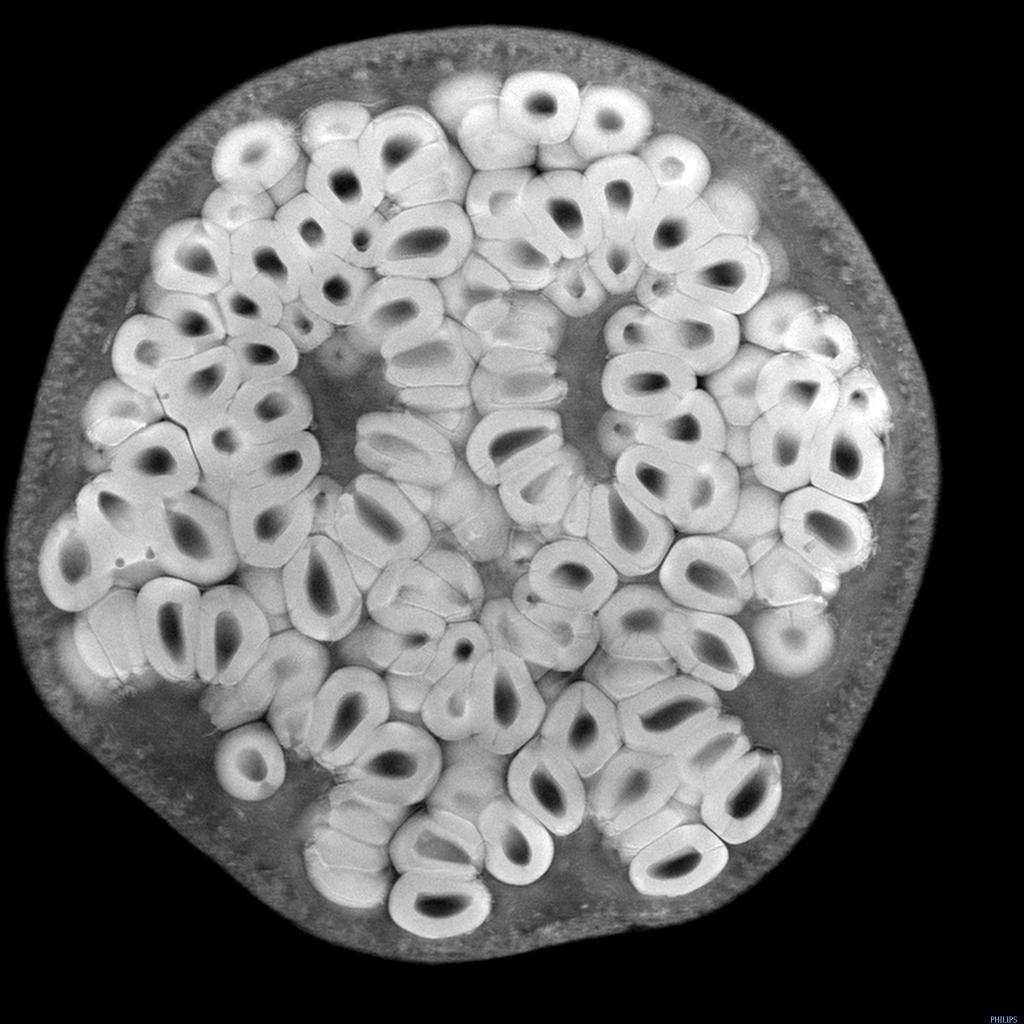
Fig 2. Pomegranate (n.d) 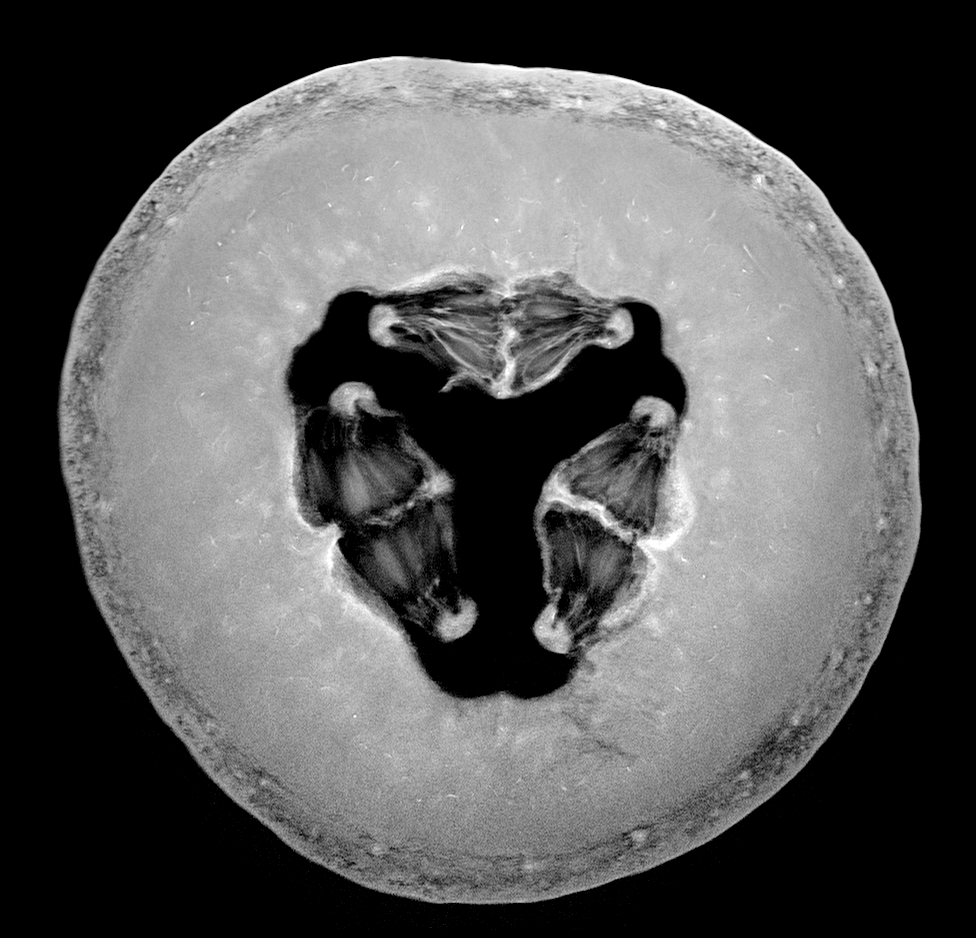
Fig 3. Melon (n.d)
Symmetry and reflection examples
As previously mentioned above symmetry and asymmetry is an interesting concept to consider within photography as it creates a sense of balance and intrigue to the composition. It would be possible to explore either one or both of these techniques when photographing fruits, flowers and any other object that naturally features a constant similarity pattern throughout.
Symmetrical photography is pretty straightforward and explains itself. The image is equally balanced all around, each section complimenting the other without having to be identical in detail all the time. For example, one half has a different shaped window frame to the one on the right-hand side of the image, but it’s still balanced and appealing.
Asymmetrical photography is a lot more clever and isn’t noticed straight away, which makes it more effective in my opinion. Helen Kantilaftis wrote for the New York Film Academy about photographic balance. They explained that despite an image having differences in shape and size, it is still balanced via the highlights, shadows and interesting use of filling space, making it an asymmetrically balanced image (Kantilaftis, 2014).
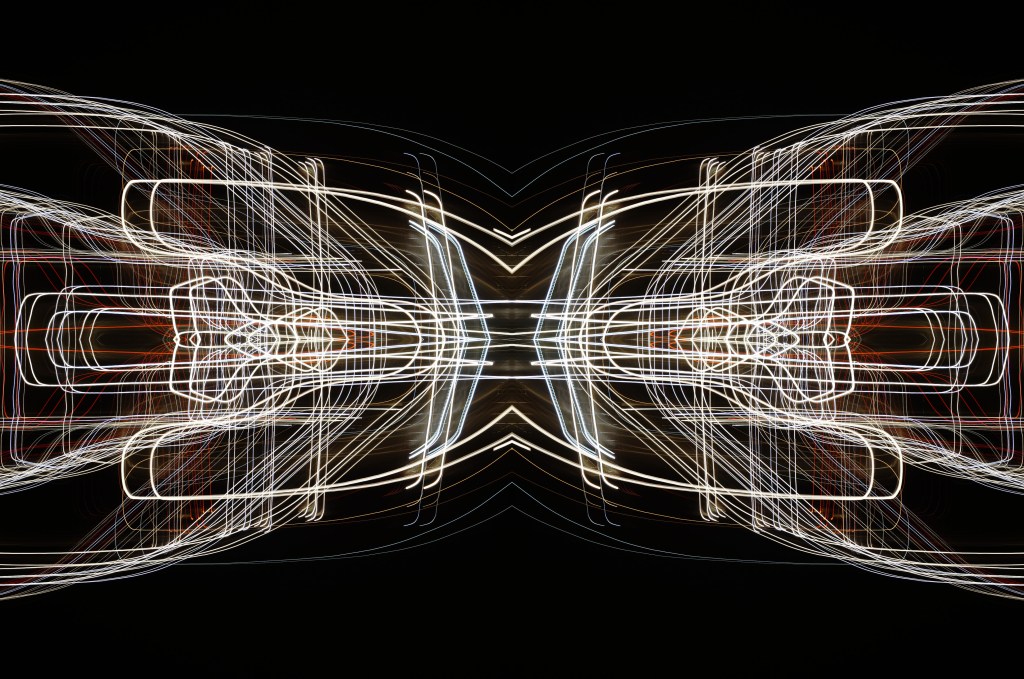
I’ve explored symmetrical photography in post-production (see Fig. 4), for a project that featured light paths from moving cars at night. After enhancing the highlights and shadows within the original image, boosting the contrast of the blacks and coloured lights, I copied it 3 more times and changed the orientation to create a 4 way mirrored image. This drew more attention to the shapes, curves of the light and the various colours, turning it into a bigger photographic light drawing. Negative space framed the busier details, preventing the composition from being too energetic and balancing it back out. Contrast is the ratio between the highlights and shadows, an element that is also levelled out within this photograph to avoid the lights being over or underexposed. If the original image hadn’t been mirrored, it would most like be asymmetric or diagonal in symmetry due to the negative space in the other half of the image.
Shoot plan:
– Take images of the cross-section of fruits and vegetables, backlit by a light pad or lightbox to emphasise the shape, details and light passing through the translucent areas.
– Focus on the details and lesser photographed elements of the subject with a macro lens set to manual.
– Maybe use a tripod to stabilise the camera, but make a judgement while shooting.
– Place white paper underneath the objects to enhance the background and prevent the camera from focusing on the reflection of the glass from the lightbox/pad.
– Set up the shoot in the conservatory on the floor to allow for different focal distances to be achieved, without having to stand on steps if it were shot on a higher surface.
– Edit the images in photoshop to black and white, before inverting the image or adding a gradient to mimic an MRI or X-Ray.
– Once the original image has been edited, copy and paste the photograph to create a quadruple mirrored image, to see what exciting results I can get.
Reflection
All of the research above has solidified what images I want to shoot, the subject I want to use and how I am going to use controlled light to create some strong compositions at the end of this assignment. The set-up may be fairly easy and cheap in terms of equipment, but planning and composing the image to draw the eyes in will take a lot of thinking, experimenting and technical knowledge to succeed. Pushing myself further by using a macro lens alongside a ‘studio’ light is going to help me grow both creatively and technically moving forward. In terms of presentation for this assignment, we are required to provide high-quality digital prints, so making sure I pick the correct images and layout will be something I’ll have to look into in more depth once the shoot is done.
References
Insider (2013). Andy Ellison X-Ray Scans of Food. [online] Available at: https://www.businessinsider.com/andy-ellison-x-ray-scans-of-food-2013-3?r=US&IR=T (Accessed 28 May 2021).
Kantilaftis, H (2014). Five Kinds of Photography Balance You Need To Understand. [online] Available at: https://www.nyfa.edu/student-resources/five-kinds-photography-balance-you-need-to-understand/ (Accessed 28 May 2021).
McKinlay, D (2017) Light Box Art: Stay Focused with Doug McKinlay [online video] Available at: https://www.youtube.com/watch?v=kWiL5N-b4YM (Accessed 28 May 2021).
List of images
Figure. 1. McKinlay, D. (2017) Light Box Art: Stay Focused with Doug McKinlay [YouTube, screenshot] Available at: https://www.youtube.com/watch?v=kWiL5N-b4YM (Accessed 28th May 2021).
Figure. 2. Ellison, A. (n.d.) Pomegranate [image] Available at: http://insideinsides.blogspot.com/p/high-resolution-still-images.html (Accessed 28th May 2021).
Figure. 3. Ellison, A. (n.d.) Melon [image] Available at: http://insideinsides.blogspot.com/p/high-resolution-still-images.html (Accessed 28th May 2021).
Figure. 4. Powell, L. 2015. Symmetry I [image] In possession of: Lauren Powell: Eastleigh.