
In this post I;
– Provided short descriptions for Quality, Contrast, Colour and Direction.
– Described my shoot set up, with camera details,
– And provided the contact sheets for this exercise.
– Chose six final images to analyse briefly,
– Before reflecting on this exercise, what it taught me and what I could’ve explored more.
‘Use a combination of quality, contrast, direction and colour to light an object in order to reveal its form. For this exercise, we recommend that you choose a natural or organic object such as an egg or stone rather than a man-made object. Man-made or cultural artefacts can be fascinating to light but they’re already authored to some degree, which requires interpretation by the photographer; this exercise is just about controlling the light to reveal form. Add the sequence to your learning log. Draw a simple lighting diagram for each of your shots showing the position of the camera, the subject and the direction of the key light and fill. Don’t labour the diagrams; quick sketches with notes will be just as useful as perfect graphics‘ (Bloomfield, 2018:91).
Unlike the previous exercises where the light was found, observed and uncontrollable, this exercise explores studio lighting and the photographer’s ability to control the lighting that falls on the subject in the frame.
There is a brief description in the coursebook explaining what quality, contrast, direction and colour is, along with the possible effects on the image and subjects themselves.
The quality of light is determined by how it looks when it falls, for example, soft shadows are caused by a diffused light, whereas harsher, more defined shadows are due to hard light like direct sunlight at midday.
Contrast is controllable by a fill light, which can either be another light source or a reflector of some kind like a whiteboard. The ratio between highlights and shadows is measured to determine the contrast ‘if you measure the shadows at f5.6 and the highlights at f8 you have a ratio of 1:2, which means that the fill light is half the intensity of the main light’ (Bloomfield, 2018).
The direction of light can alter an image dependent on the distance and the angle. If the light is placed directly in front, the subject will be significantly flatter than being lit from below or the side. As a result, harsher shadows enhancing the shapes and textures within the frame would occur.
Colour can be significant within photography to give context to the composition or encourage a specific mood and emotion to come through. Lighting filters can cover the lights to colour the background, or ‘by light bounced from a coloured reflector’ (Bloomfield, 2018).
Shoot set up:
My Sony A57 was on manual mode, with an aperture of f/1.8 and an ISO of 200. The only changes made were the shutter speed and focal length where necessary. The subject sat in the corner of a bedroom to compensate for how small my LED light is, ultimately a wise choice as the shadows became very soft when pulled away from the corner. A sheet of A4 paper was on a small cardboard box to act as a curved background for the shell to sit and reflect the light. I used a small LED lightbox on a tripod as a stabiliser when stood up and a handle when lifting the light from the floor. During the second part of the shoot, I used the light from my iPhone 6 to see the effects a tiny, duller light would have on the shell.
Contact Sheets:
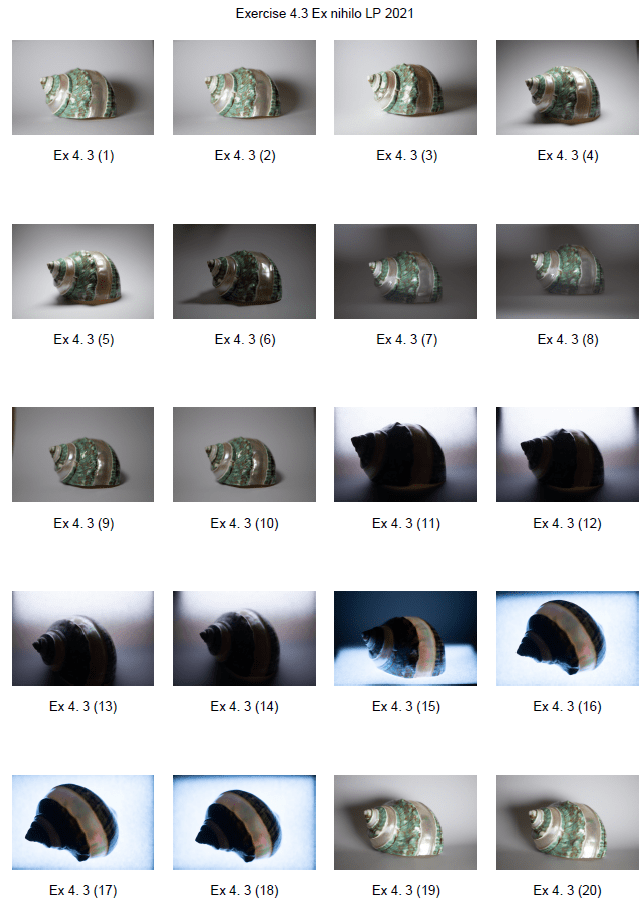
Fig. 1. Contact sheet 1 (2021) 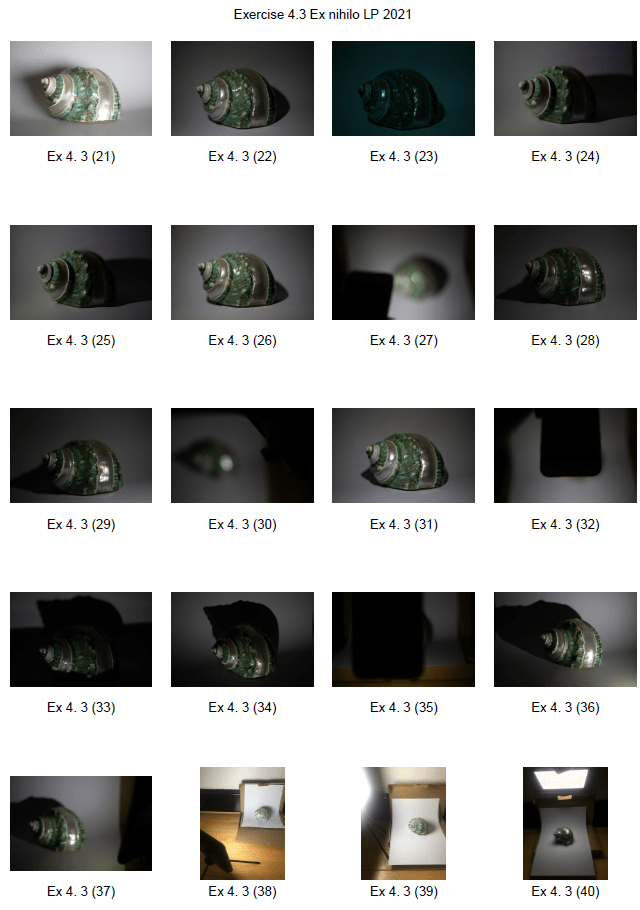
Fig. 2. Contact sheet 2 (2021) 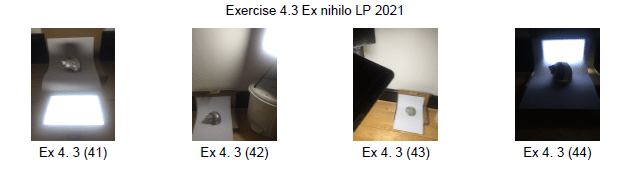
Fig. 3. Contact sheet 3 (2021)
Images for analysis:
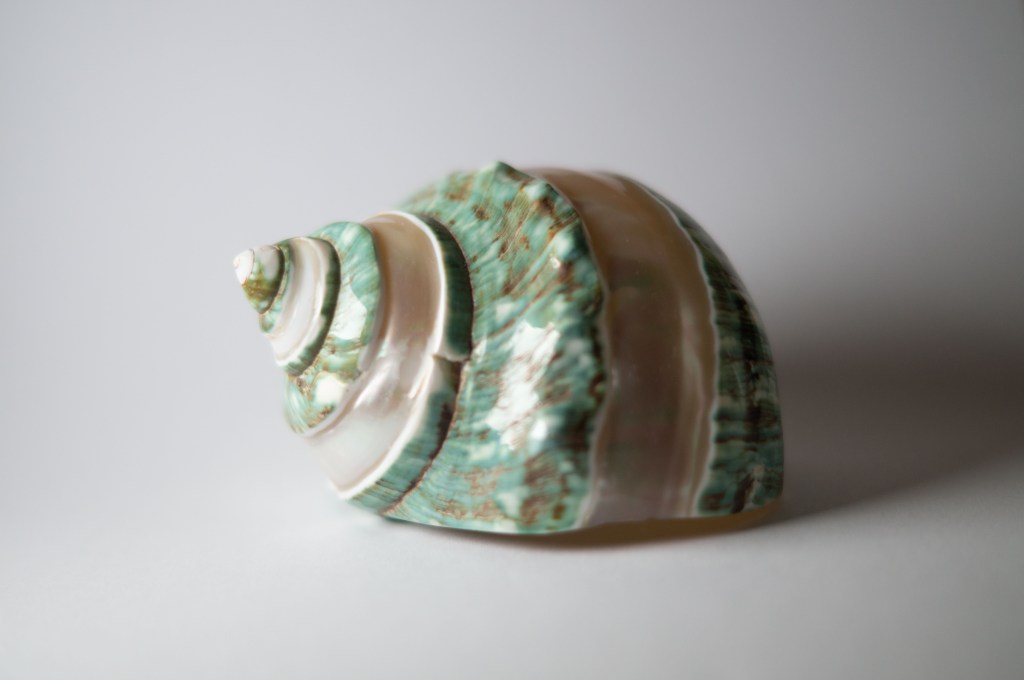
Fig. 4. 1 (2021) 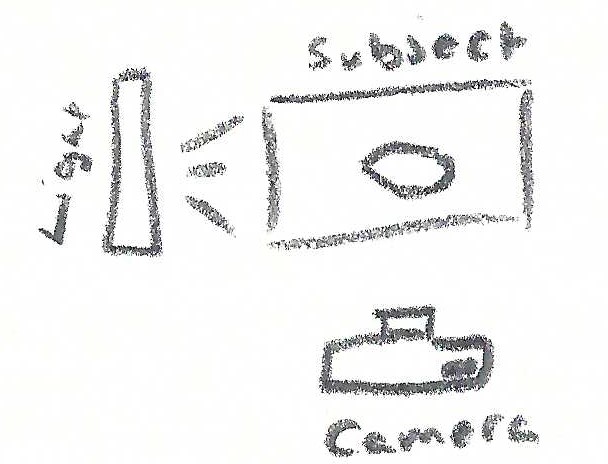
Fig. 5. Diagram 1 (2021) 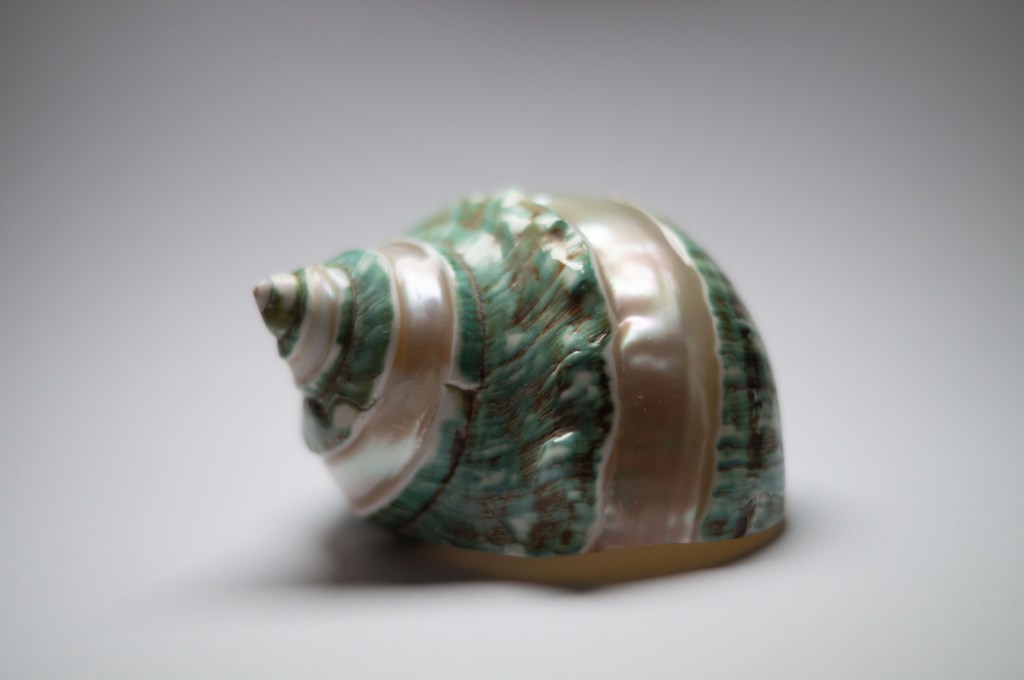
Fig. 6. 2 (2021) 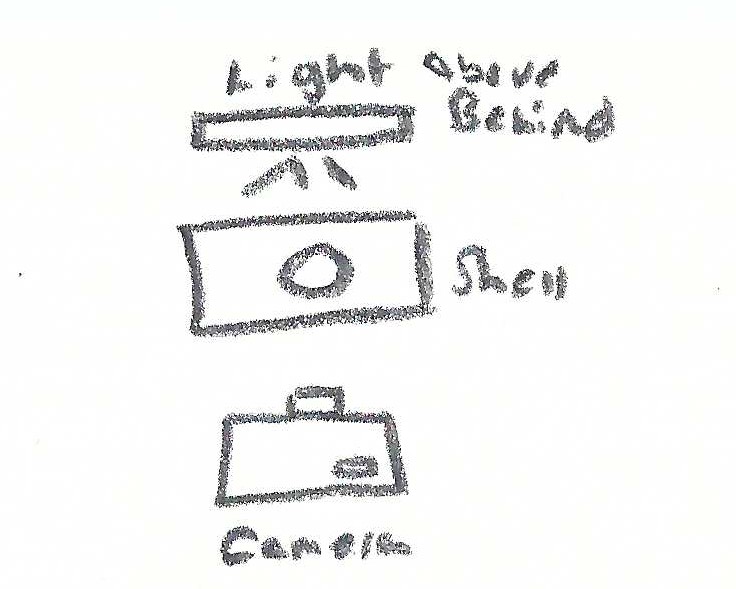
Fig. 7. Diagram 2 (2021) 
Fig. 8. 3 (2021) 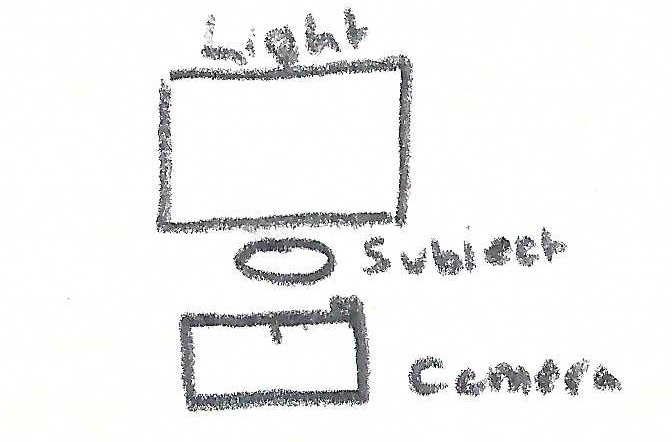
Fig. 9. Diagram 3 (2021) 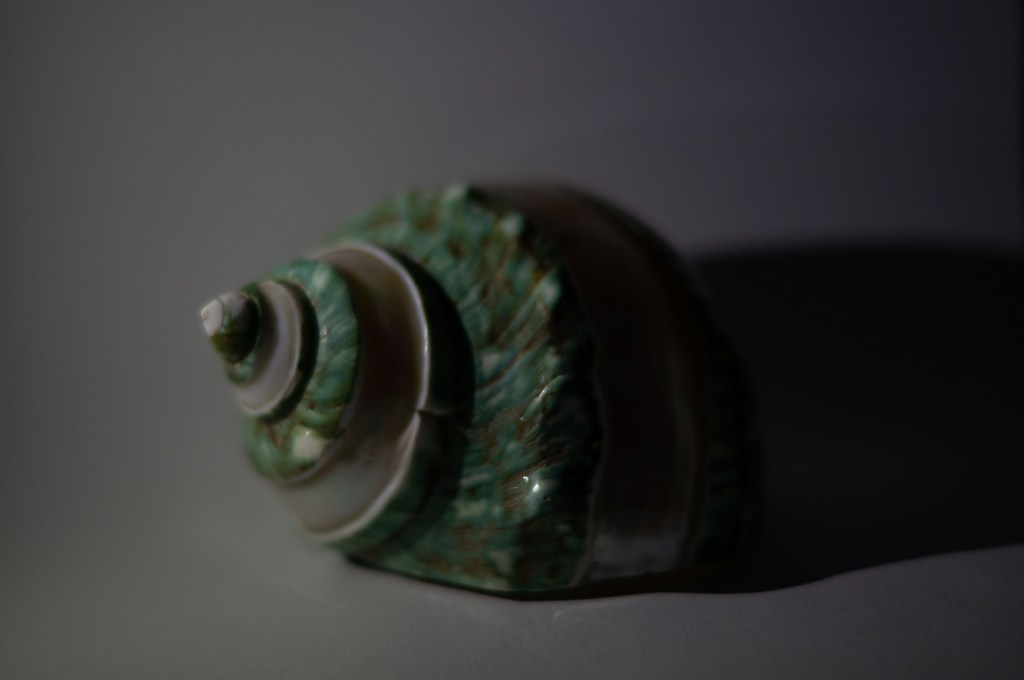
Fig. 10. 4 (2021) 
Fig. 11. Diagram 4 (2021) 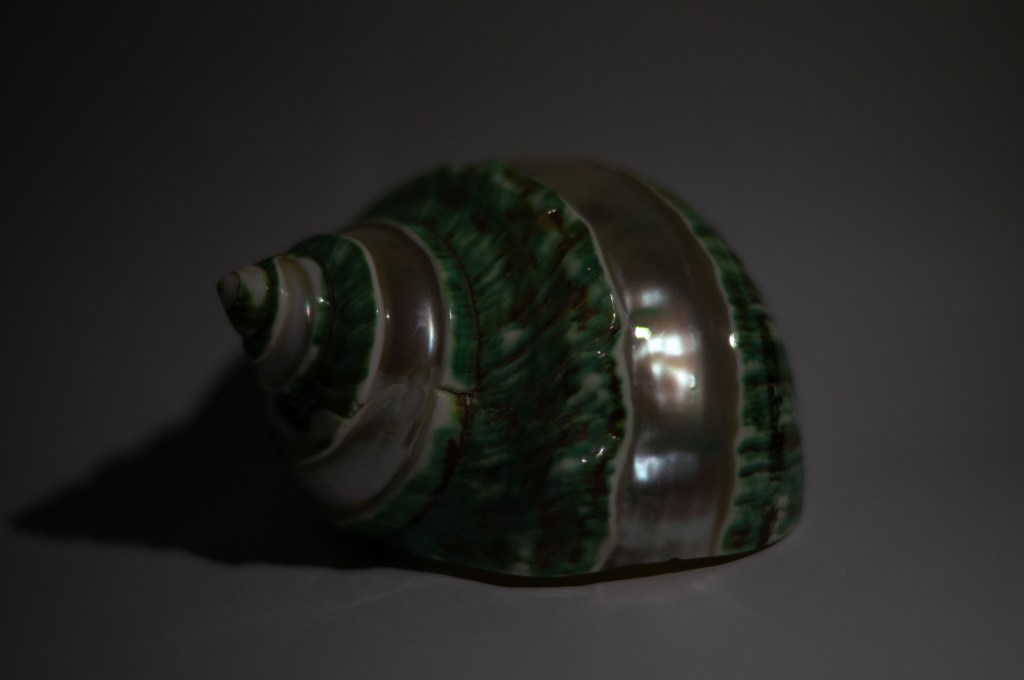
Fig. 12. 5 (2021) 
Fig. 13. Diagram 5 (2021) 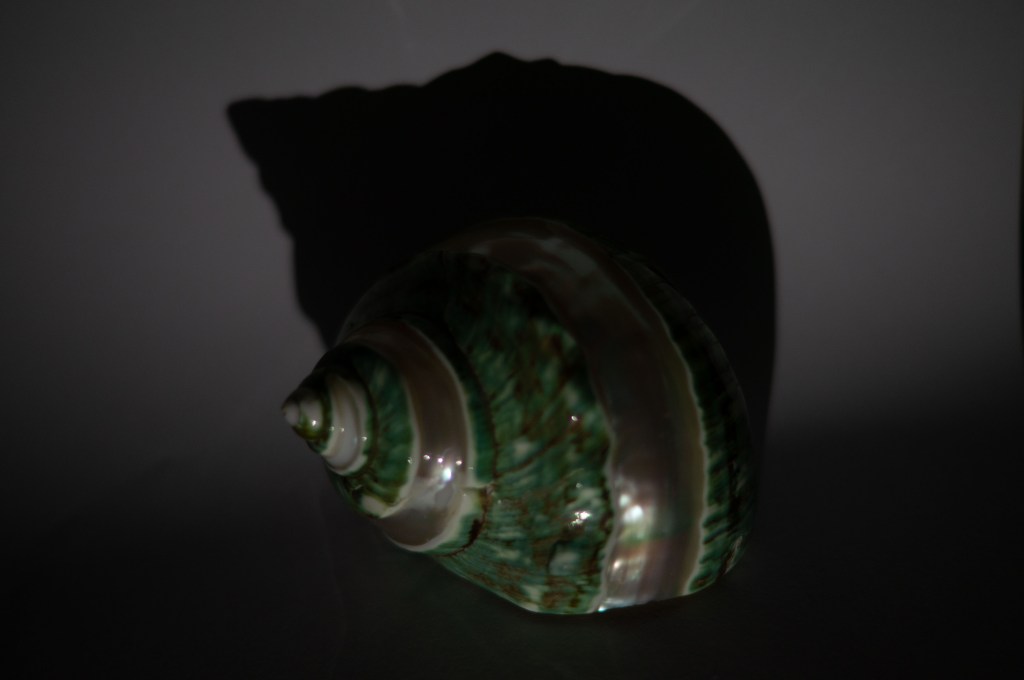
Fig. 14. 6 (2021) 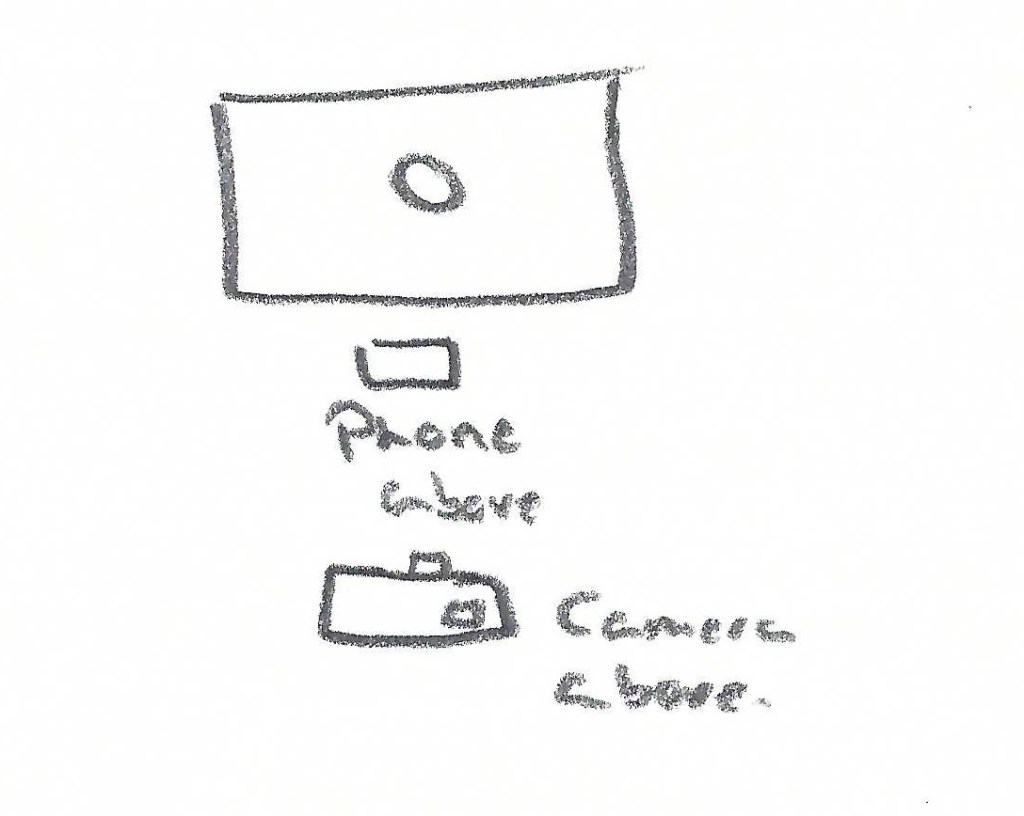
Fig. 15. Diagram 6 (2021)
1- The LED box placed close to the side of the shell resulted in a softer diffused shadow, which follows the curve of the paper. Due to the intensity of the light, there are bright highlighted patches by the point of the shell, enhancing the shiny reflecting surface while the shadows fill in the grooves and curves. A very subtle yellow colour can be seen underneath the shadow, a reflection of the light entering and bouncing off of the inside of the shell, providing a bit of warmth to the aqua greens.
2- I lifted the LED light above and behind the shell to see what results I would get if it were down-lit, rather than the typical front or side position. The contrast between the highlights and shadows are much more even than the previous shot, without being flat. Lighting the shell from behind defined the textures and shapes within without being too bright or too dark. The image isn’t a flat silhouette due to the height of the light, forming a slightly stronger shadow that provides depth from the front of the shell, indicating the direction of light.
3- A bolder approach was used for this picture by lighting the shell entirely from behind. I covered the LED light with the white sheet of paper and shot the image directly from the front to capture a silhouette of the shell. The shell is not a full silhouette because we can see the grooves and textures of the surface; due to the light falling on top and through the thin walls of its body. The highlights and shadows are still heavily contrasted as the whites are extremely bright, while the blacks are dark, capturing a harsher outline of the subject.
4- The light source for the following images is from an iPhone 6, which is less intense and much smaller than the LED box. Compared to image 1, this light is a lot duller, while the shadows are harsher due to the size and proximity to the subject. The swirls within the shell are heavily defined in this shot due to the darker nature of these images.
5- Lighting from a front angle has allowed the highlights to reflect off its shiny surface and show off the pearlescent colours of the body. Meanwhile, the shadows are enhancing the natural swirls within the point of the shell and defining the sharpness of the point via a hard shadow to the left of the paper. Despite the light being slightly further away from the shell, the tones and overall balance of the image if fairly similar to the 4th image.
6- For the final image, I lit the image from the front but shot from an angle above the shell, capturing the shadow that fell behind it. The front of the shell is evenly lit, reflecting off of the body as the light hits it, while the back half of the shell is dark and less defined due to the lack of light. Despite the white sheet of paper, the light wasn’t strong enough to act as a fill light. Shooting from above allows us to see the intense, dark and extended shadow, rather than a tiny shadow at the bottom if we were to place the camera directly in front of the shell.
Reflection:
Studio lighting can dramatically change the result of composition. Having complete control over the distance of the light to the subject, the angle, the temperature or the colour of the light can decide how contrasted or defined the image is. Lighting a person or object from the front and having the camera at the same position would result in a flatter image with few shadows to help with definition. Lighting from the side or at an angle and shooting from the front allows for more textural details to be shown and brings more depth to the shot. Backlighting on a small scale was quite challenging as the light didn’t fill the paper, but I could’ve taken more time to frame the image a little closer in.
I didn’t explore contrast and metering much in this exercise, however, it’s helped me understand how balancing highlights and shadows, or doing the complete opposite by pushing one or the other to the extreme can help change the mood or finish of the piece.
References:
Bloomfield, R., 2018. Photography 1: Expressing your Vision. 4th ed. [pdf] Barnsley: OCA, pp. 90, 91. Available at: https://www.oca-student.com/course/photography-1-expressing-your-vision [Accessed 7 May 2021].
List of images:
Figure. 1. Powell, L. (2021) Contact sheet 1 [pdf, screenshot] In possession of: Lauren Powell: Eastleigh.
Figure. 2. Powell, L. (2021) Contact sheet 2 [pdf, screenshot] In possession of: Lauren Powell: Eastleigh.
Figure. 3. Powell, L. (2021) Contact sheet 3 [pdf, screenshot] In possession of: Lauren Powell: Eastleigh.
Figure. 4. Powell, L. (2021) 1 [image] In possession of: Lauren Powell: Eastleigh.
Figure. 5. Powell, L. (2021) Diagram 1 [scanned document] In possession of: Lauren Powell: Eastleigh.
Figure. 6. Powell, L. (2021) 2 [image] In possession of: Lauren Powell: Eastleigh.
Figure. 7. Powell, L. (2021) Diagram 2 [scanned document] In possession of: Lauren Powell: Eastleigh.
Figure. 8. Powell, L. (2021) 3 [image] In possession of: Lauren Powell: Eastleigh.
Figure. 9. Powell, L. (2021) Diagram 3 [scanned document] In possession of: Lauren Powell: Eastleigh.
Figure. 10. Powell, L. (2021) 4 [image] In possession of: Lauren Powell: Eastleigh.
Figure. 11. Powell, L. (2021) Diagram 4 [scanned document] In possession of: Lauren Powell: Eastleigh.
Figure. 12. Powell, L. (2021) 5 [image] In possession of: Lauren Powell: Eastleigh.
Figure. 13. Powell, L. (2021) Diagram 5 [scanned document] In possession of: Lauren Powell: Eastleigh.
Figure. 14. Powell, L. (2021) 6 [image] In possession of: Lauren Powell: Eastleigh.
Figure. 15. Powell, L. (2021) Diagram 6 [scanned document] In possession of: Lauren Powell: Eastleigh.

One thought on “Exercise 4.3 – Ex Nihilo”