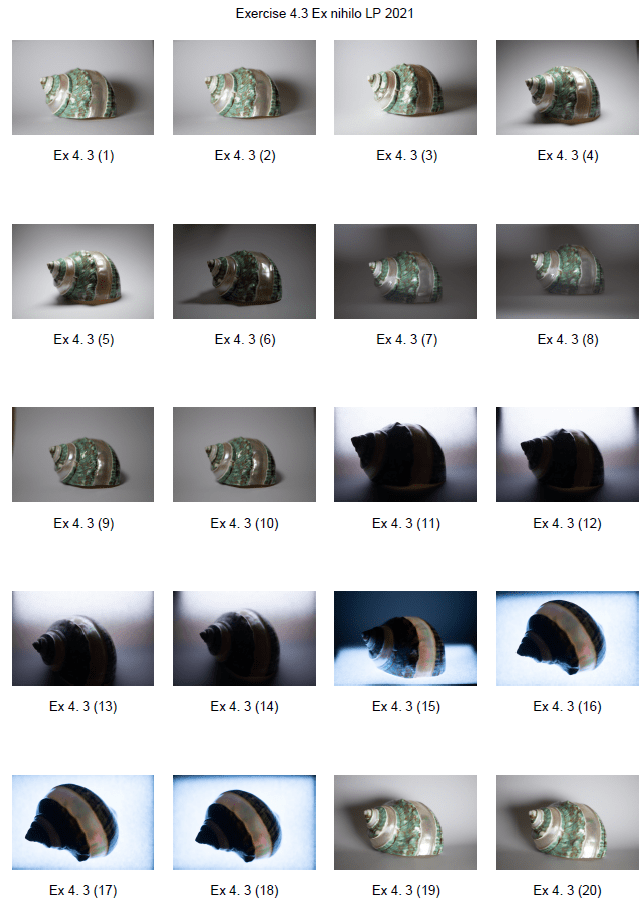
Summary
In this post I have
– Briefly discussed my mind-map post
– Explained how my preferred concepts led me to research via YouTube and books
– Before explaining three techniques, how they’re done and the results you can get
– Including screenshots and scans of the examples from the research
– Finishing the post with a short reflection about these techniques and what I plan to do as a project.
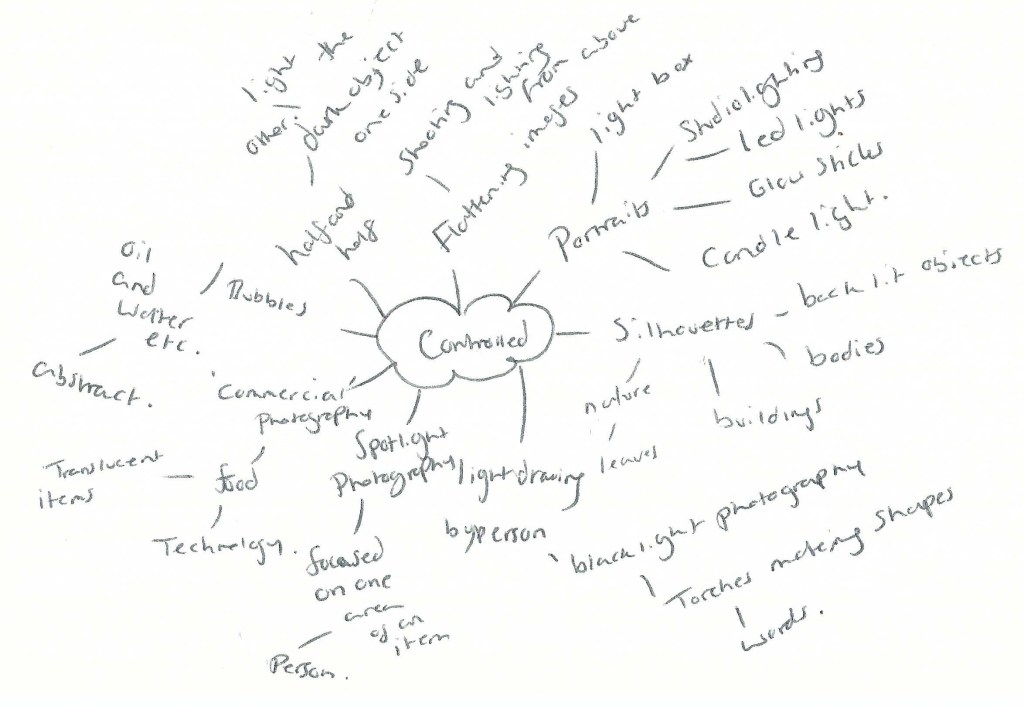
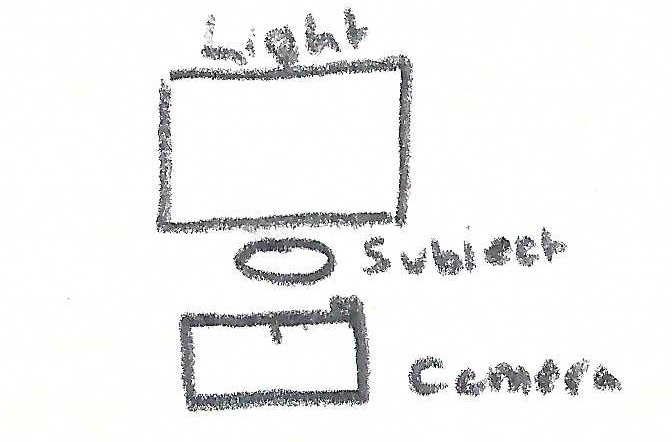
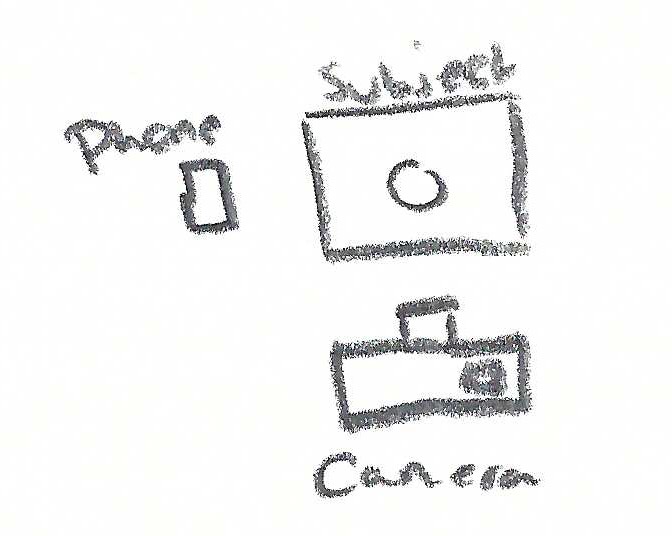
In my last post, I briefly discussed my mind-maps for both artificial light and controlled light, the multiple techniques, concepts and possible subjects that could be explored, along with their pros and cons. The ideas ranged from cityscapes to light casts, streetlamps and their shadows, light drawings, spotlight photography, commercial and lightbox photography.
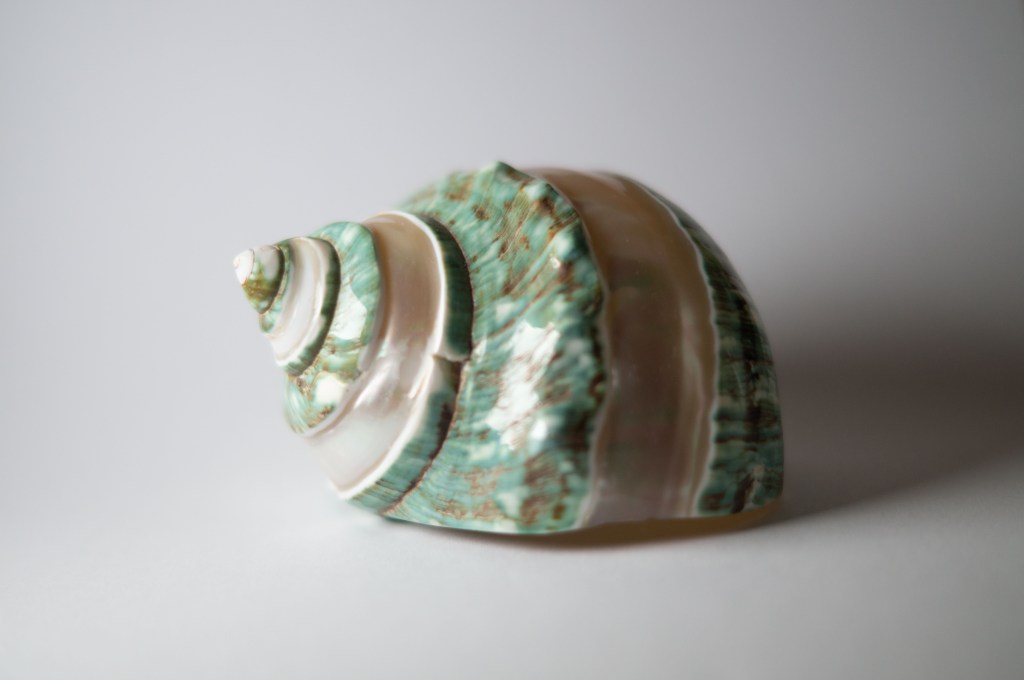
As mentioned in my initial thoughts I sat with the ideas I was interested in most, which were silhouette and lightbox photography. While these ideas were in the foreground of my mind, I searched YouTube for further ideas and tutorials for lightbox, abstract and macro photography, as well as referring to an experimental photography book. This helped me figure out the direction I want to take for this assignment while pushing me to explore techniques I’d not done before or in a long time.
Oil and water
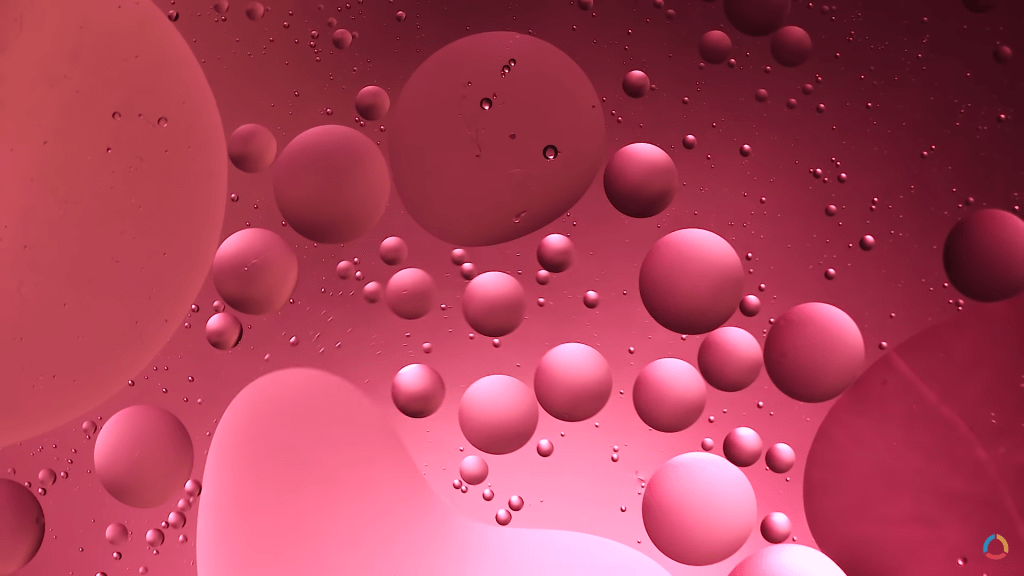
One of the first concepts I thought of when exploring the idea of using a lightbox, was oil and water macro photography, a simple set-up with incredibly unique results. Lighting the subject from behind (or below if it’s flat on a surface) and lifting the subject high above the light source intensifies the shallow depth of field, diffusing the colours below and making sure the main focal point is the bubbles in the frame. You can adjust the colours used underneath, the direction they’re pointing and the shape of the oil bubbles by stirring it and manipulating the mixture (Adaptalux, 2019). Ben from Adaptalux inserted videography of his results at the end of the YouTube tutorial, which I was able to take a screenshot of (See Fig. 1) for future reference.
Having more control over the process, can result in some incredible shots and allow you to get the exact outcome you’re looking for, however, it is possible to let gravity and chemistry take control of the subject while you focus on the light. This technique is full of flexibility, depending on what you prefer to do, but not so much so that you don’t have to plan or take control of what is going on. While this would be perfect to use for a controlled light project, it is also a concept I’ve explored myself in the past, so isn’t ideal for pushing myself further. The set-up and technical information regarding light placement, filters and stability for the camera/subject from this specific tutorial have still been beneficial for me to consider for this assignment, so worth the watch and research time.
Abstract paper photography
Another tutorial I saw from Adaptalux on YouTube, was an abstract photography project with nothing but lighting and paper. Much like the previous project with the oil and water the lighting is coming from underneath the subject (backlit when it’s flat on a surface) via the use of a lighting arm and some diffusion filters for additional colour. Before shooting, the camera is set up on a tripod and the focus is set beforehand so all that has to be changed is the paper folds, positioning or lighting direction/colour. The height of your camera and the focal range of your lens can result in an extremely close frame or a wider shot depending on your preference, making this another flexible technique to try out (Adaptalux, 2020). You can either fold the paper, roll it up, use one sheet or multiple sheets and manipulate their shape to get a variety of styles to shoot. Despite being lit from below, due to the curves in the paper, soft shadows are captured as opposed to a silhouette or flat image of the item in the frame.
Shooting the cross-section of paper is much more interesting than I first imagined it would be, as it cuts the camera frame into multiple sections and is ambiguous in terms of the subject (see Fig. 2). Abstract art is meant to be ambiguous and cause questions to be asked, in turn making it a much more complex idea to explore and play around with.
I’ll definitely consider exploring this particular technique, even if it’s not chosen for this assignment.

Lumen prints
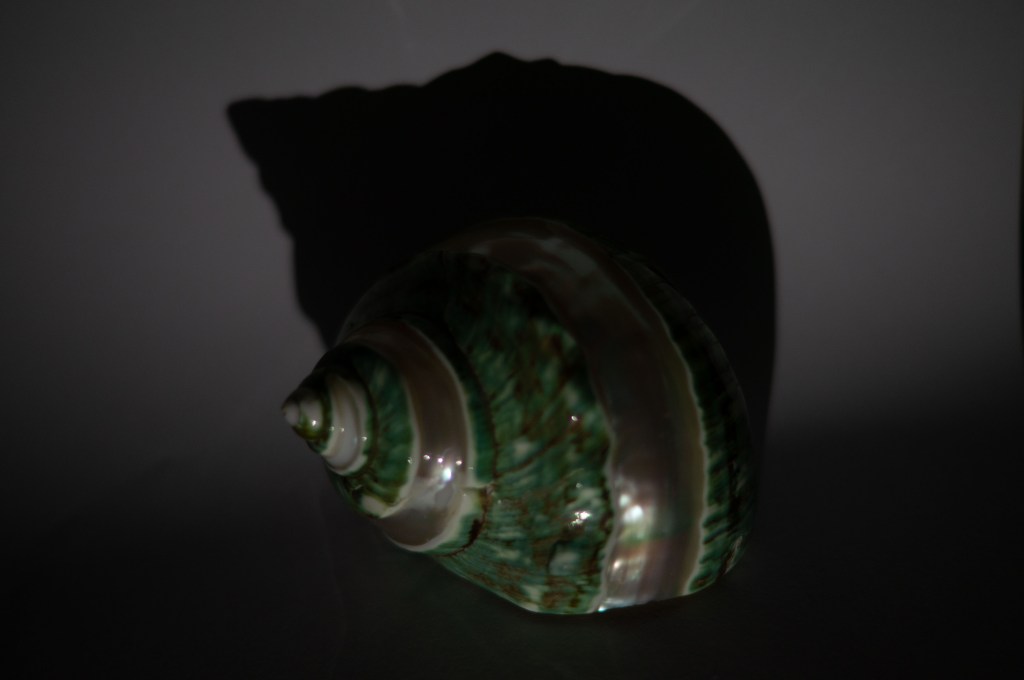
Despite not having the products needed for this particular experiment, looking through Thames & Hudson’s book Experimental Photography (Bendandi et al., 2015) gave me something to think about in terms of photographic presentation and technical choices made in photography. The contact printing frame used for this experiment (see Fig. 3) looked similar to a light pad, a thin LED glass pad used for tracing for art and other such things, while the lumen print Francisco Gomez managed to produce (see Fig. 4), reminded me of a photographic film after they’ve been developed. Placing the leaves on a piece of photographic paper, blocked those specific areas from the light, much like objects do when shooting with film. The denser subject is shown via a ghostly silhouette; with a few shadows to define the details where light has seeped through, while the open areas are much darker to show how much light the paper was subjected to during the experiment. By ‘inverting’ the print with Photoshops gradient map, the image looks like a typical sepia print, which has got me thinking about the possibility of creating digital ‘negatives’ for this assignment and how light can affect the results of an image.
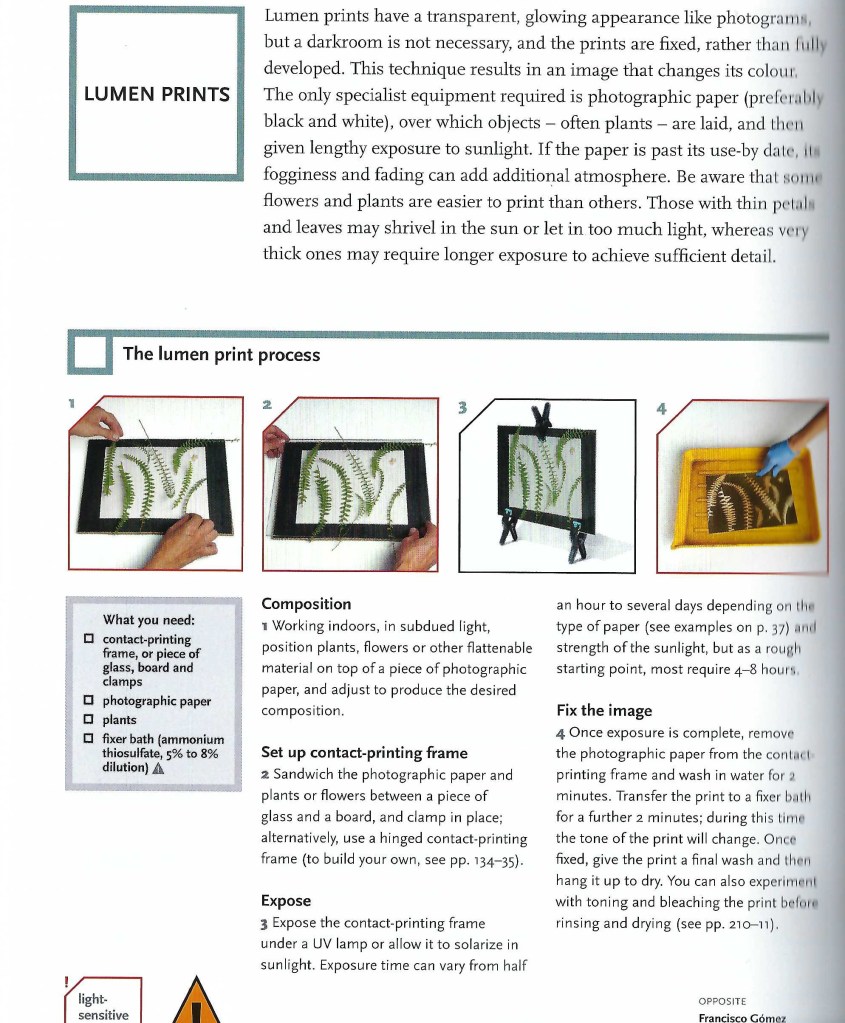
Fig. 3 Lumen Prints (2015) 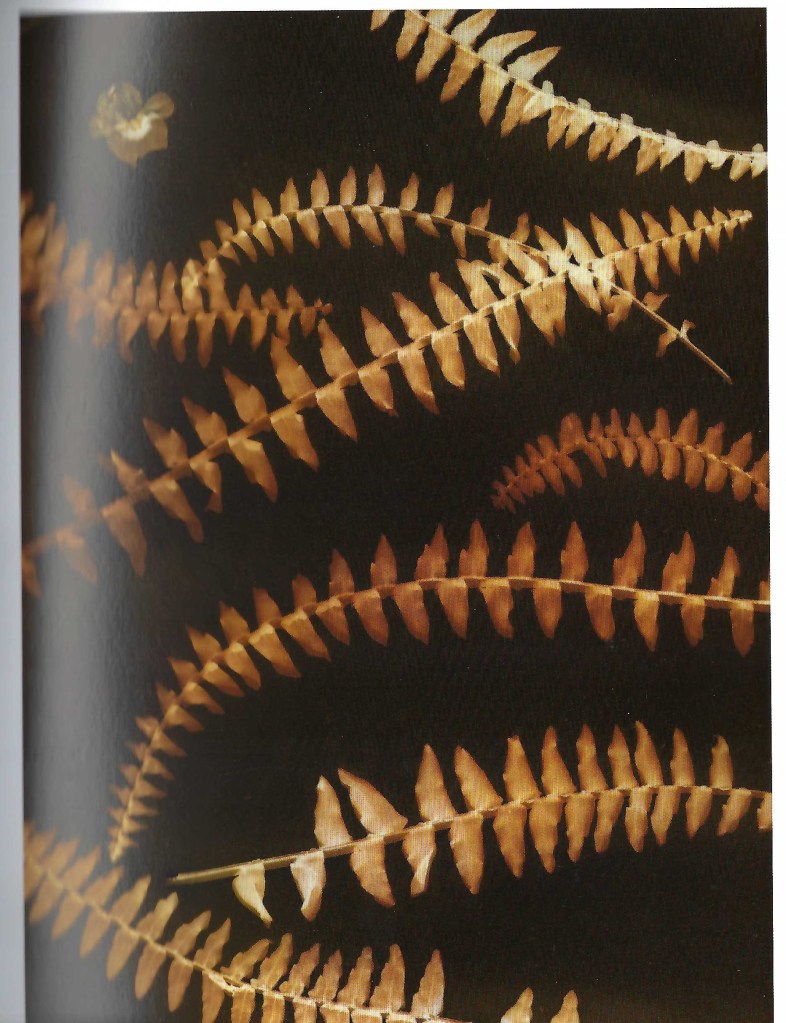
Fig. 4 Lumen Print (2013)
Reflection
The techniques explored in this post have helped me understand a variety of techniques that can be used for this particular assignment, including macro photography, inverting photographs and experimenting with light, colour and its subjects. Abstract photography is unique and results in a never-ending list of outcomes, especially if the subject is constantly moving, such as oil bubbles in the water. Despite having total control of the light it doesn’t mean that you are in control of everything which I like. Lumen prints could be similar if you measure the exact amount of time the paper is exposed for, but the subjects used to make the composition are most likely to be different, even by a millimetre.
This has me thinking about film photography and how you have a restricted amount of time to get the desired image. Over or underexposure could make or break an image, influencing the mood or details of the subject. One second out, or one wrong move and you could’ve missed the ‘perfect’ composition. Light levels are shown on a negative via the translucent and opaque areas; the lighter areas are caused by denser objects that have been less exposed to light, in comparison to the darker areas such as a clear sky or another strong light source.
For my Languages of light assignment, I may explore the use of a light pad or lightbox to illuminate subjects from the bottom, how lens filters or gels could affect the overall image and how to create digital ‘negatives. Further research is needed to make this decision.
References
Adaptalux, 2019. Oil & Water Bubble Photography & Videography Tips | Macro Photography Tutorial. Available at: https://www.youtube.com/watch?v=mixLIIQ5N00&t=678s [Accessed 18 May 2021].
Adaptalux, 2020. How to shoot beautiful abstract photography using paper!. Available at: https://www.youtube.com/watch?v=2oM41u3JyCc&t=335s [Accessed 18 May 2021].
Bendandi, L., Minniti, S., Gómez, F., Lungarella, G. and Antonini, M., 2015. Experimental photography. 1st ed. London: Thames & Hudson, pp.34-35.
List of images
Figure. 1 Adaptalux. (2019) Oil and Bubble videograph by Adaptalux [YouTube, screenshot] Available at: https://www.youtube.com/watch?v=mixLIIQ5N00&t=678s [Accessed 18 May 2021].
Figure. 2 Adaptalux. (2020) Abstract photography with paper by Adaptalux [YouTube, screenshot] Available at: https://www.youtube.com/watch?v=2oM41u3JyCc&t=335s [Accessed 18 May 2021].
Figure. 3 Gómez, F. (2013) Lumen Prints [Scanned page] In: Bendandi, L., Minniti, S., Gómez, F., Lungarella, G. and Antonini, M. (2015) Experimental photography. 1st ed. London: Thames & Hudson, p.34.
Figure. 4 Gómez, F. (2013) Lumen Print [image] In: Bendandi, L., Minniti, S., Gómez, F., Lungarella, G. and Antonini, M. (2015) Experimental photography. 1st ed. London: Thames & Hudson, p.35.