
Summary:
For this exercise I;
– Documented the brief and my initial thoughts about it, stating my nerves towards it alongside my plans for the task.
– Stated the camera settings used, fitting what was requested in the brief as well as personal choices to reflect the light levels in my home.
– Provided annotated contact sheets of the images shot during this exercise, before selecting a few examples with technical details, to show what was captured, the strengths and weaknesses of each and the images I felt were the strongest.
– Reflected on my initial thoughts and how these have changed having done the exercise, as well as what I have learnt from this task and how the techniques may influence me in the future.
Brief:
‘Start by doing some of your own research into the photographers discussed above. Then,
using fast shutter speeds, try to isolate a frozen moment of time in a moving subject.
Depending on the available light you may have to select a high ISO to avoid visible blur
in the photograph. Add a selection of shots, together with relevant shooting data and a
description of process (how you captured the images), to your learning log‘ (Bloomfield 2018).
Initial thoughts
After researching the suggested photographers, I was slightly apprehensive as to how to experiment with shutter speed due to the lack of an electronic flash that can help with freezing a moment and supply extra light if needed.
However, despite the lack of equipment, I took into consideration the encouragement to step out of the comfort zone and go ahead with the idea that may not have been the easiest to execute.
‘The key to a successful third assignment is simple – the depth of your experimentation in the practical exercises …’ (Bloomfield, 2018:57).
One idea that came to mind was to try and capture a subject flicking their hair with a variety of shutter speeds, to see if any motion blur would occur or whether the movements would be frozen completely. After much thought, this approach seemed too easy to use as I have done this previously for personal work, hence my decision to freeze the process of making a cup of coffee with the challenge of restricted light.
As instructed in the course handbook, I set my SONY A57 to shutter priority mode, continuous shooting and set the ISO to 6400 to allow for a faster shutter speed to be used, without causing too much grain in the images. Despite these settings, the exposure was still slightly too dark; therefore, I made small adjustments in post-production so the imagery was much clearer to study.
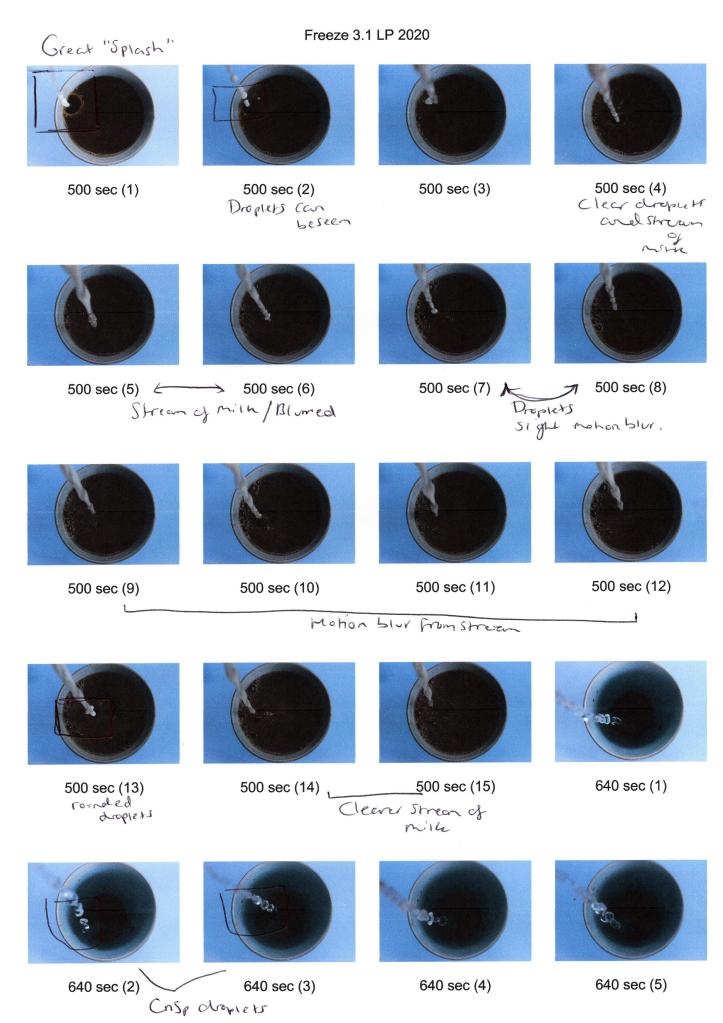
Fig. 1. Contact sheet 1 (2020) 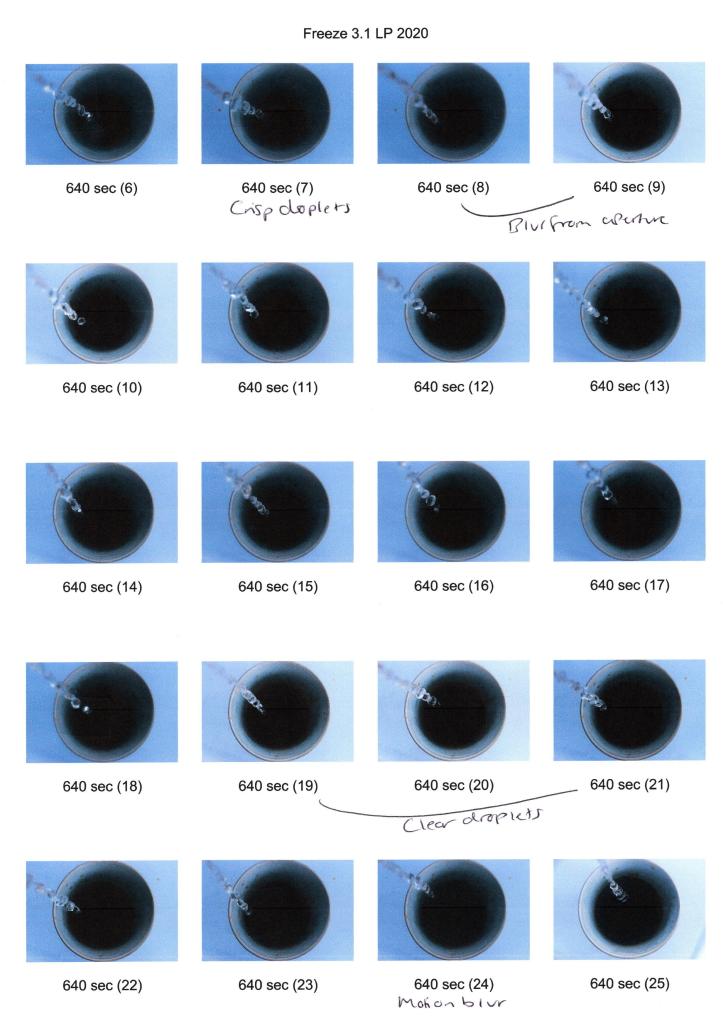
Fig. 2. Contact sheet 2 (2020) 
Fig. 3. Contact sheet 3 (2020) 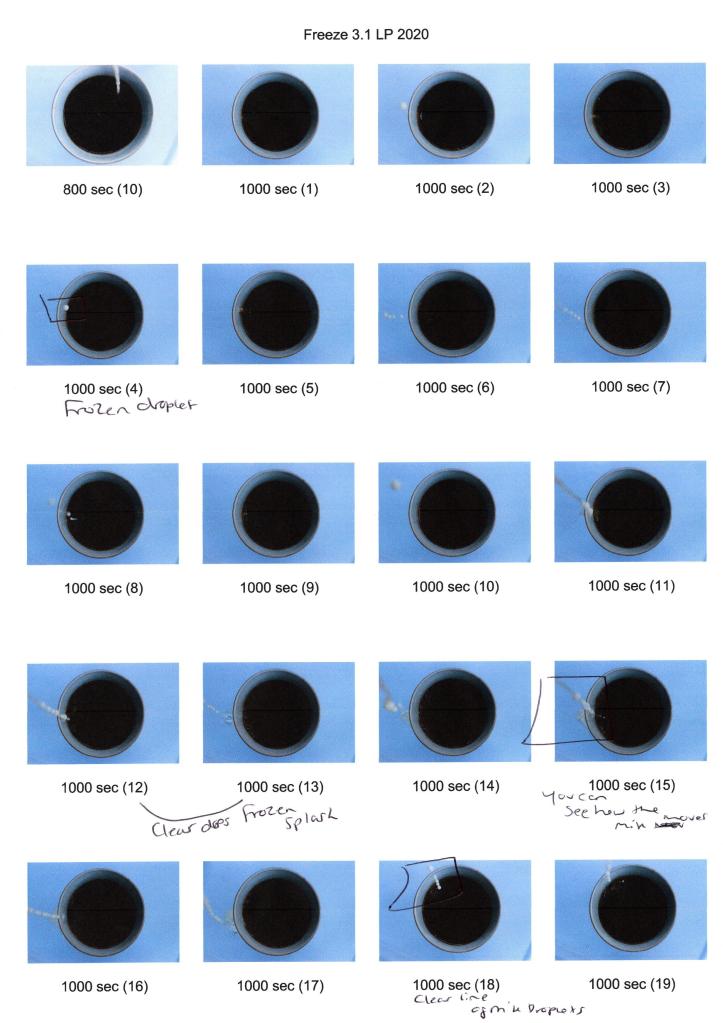
Fig. 4. Contact sheet 4 (2020) 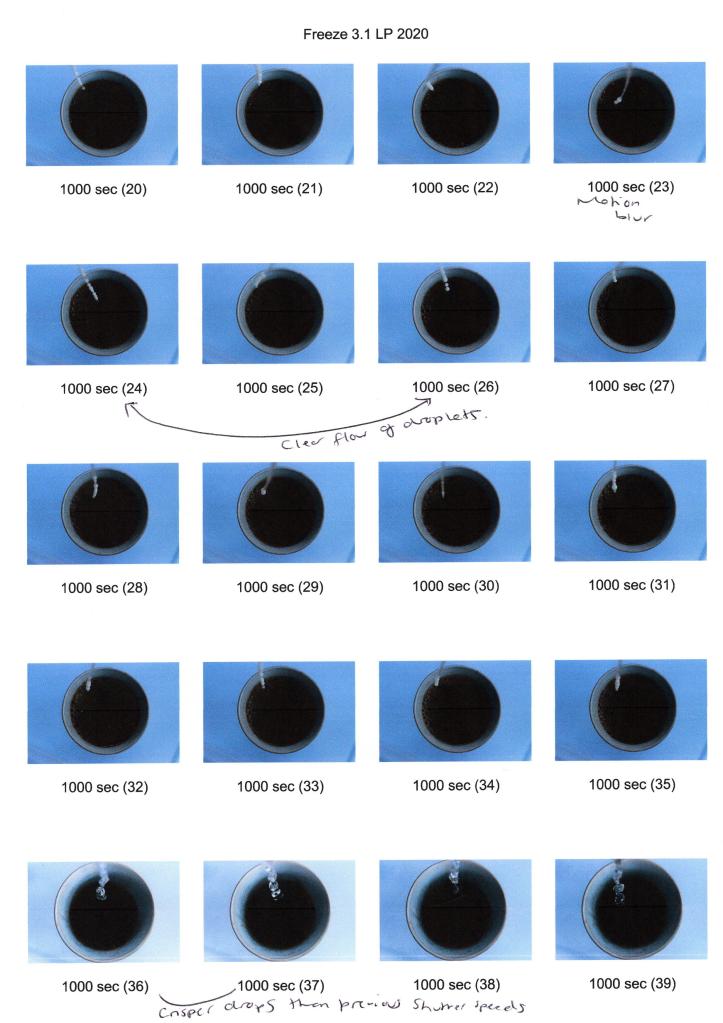
Fig. 5. Contact sheet 5 (2020) 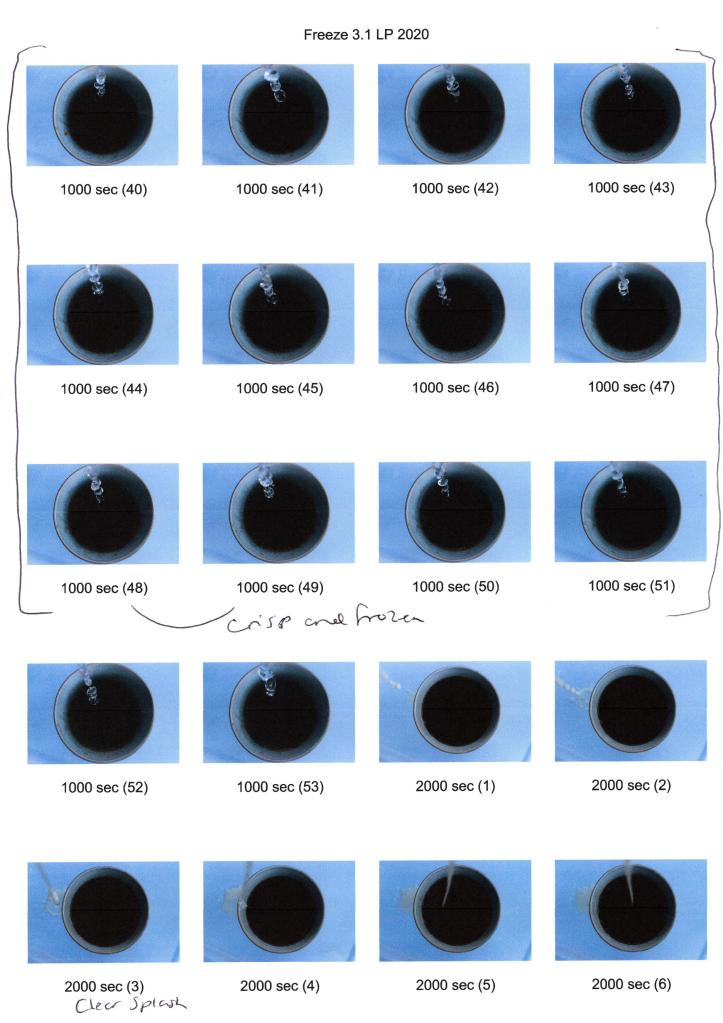
Fig. 6. Contact sheet 6 (2020) 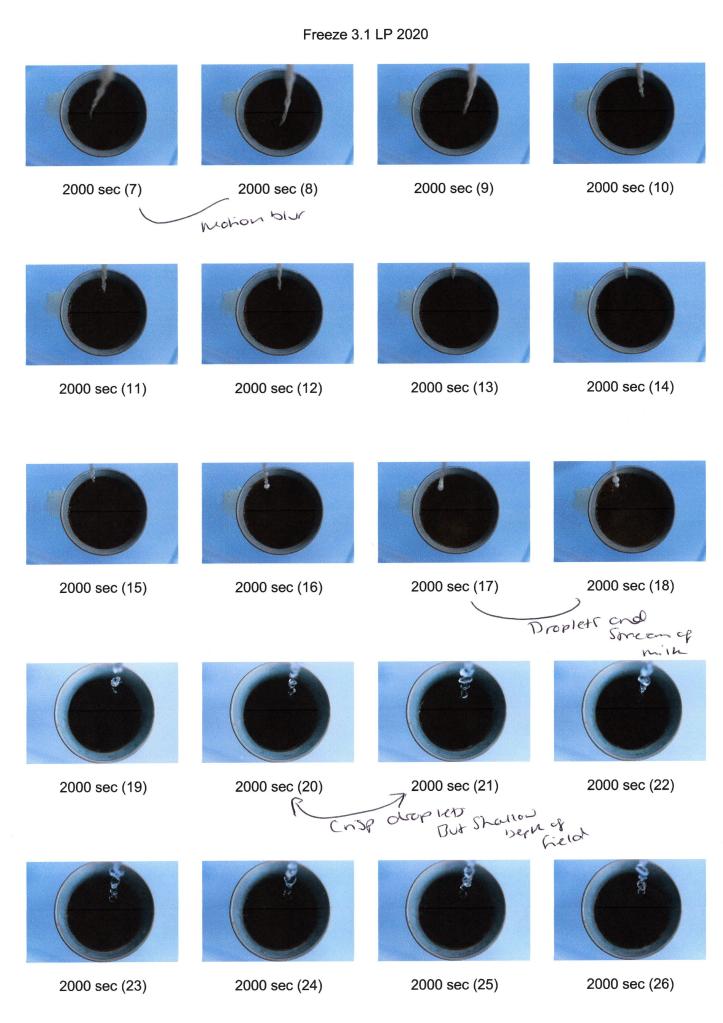
Fig. 7. Contact sheet 7 (2020) 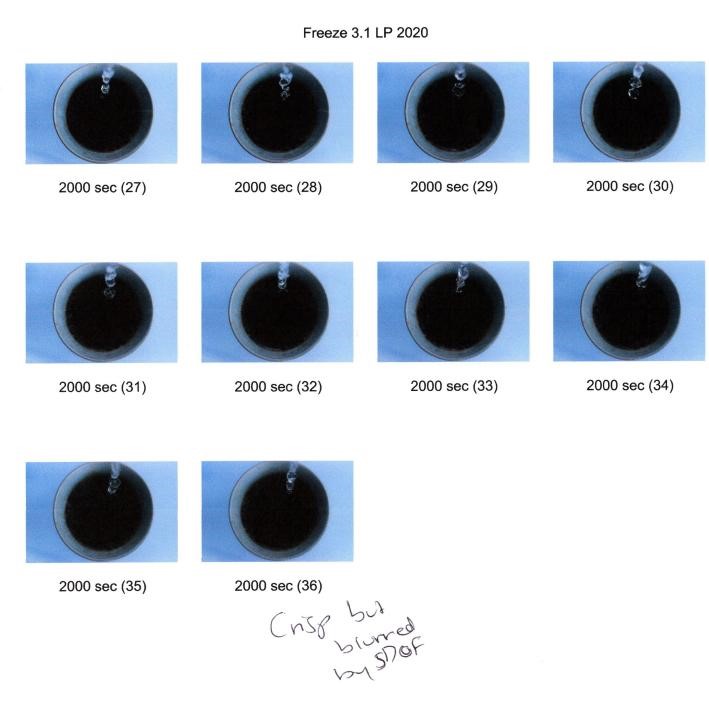
Fig. 8. Contact sheet 8 (2020)
For this exercise, I placed my camera onto a tripod and positioned it firmly on the table, making sure the lens was facing directly above the cup. To avoid any distraction from the tripod legs and jugs used to pour the liquids, I adjusted the SONY 18-55 3.5-5.6 SAM lens the longest focal length of 55mm and in turn, tightly framed the coffee cup.
Using a ring light to provide extra light, didn’t make any difference at all due to the natural light already in the room; consequently I decided to go ahead with the daylight already available and kept the exposure in mind when altering the shutter speeds. As seen above, the selected speeds to experiment with were 1/500, 1/640, 1/800, 1/1000 and 1/2000, allowing me to capture a range of shots to compare and understand frozen moments in time.
Unfortunately, the fastest shutter speed I could use was 1/2000, before the exposure started to get darker due to the camera’s light sensitivity limit. While I would’ve liked to have used an even higher setting, the chosen speeds still provided me with a distinct, frozen set of shots to complete this exercise.
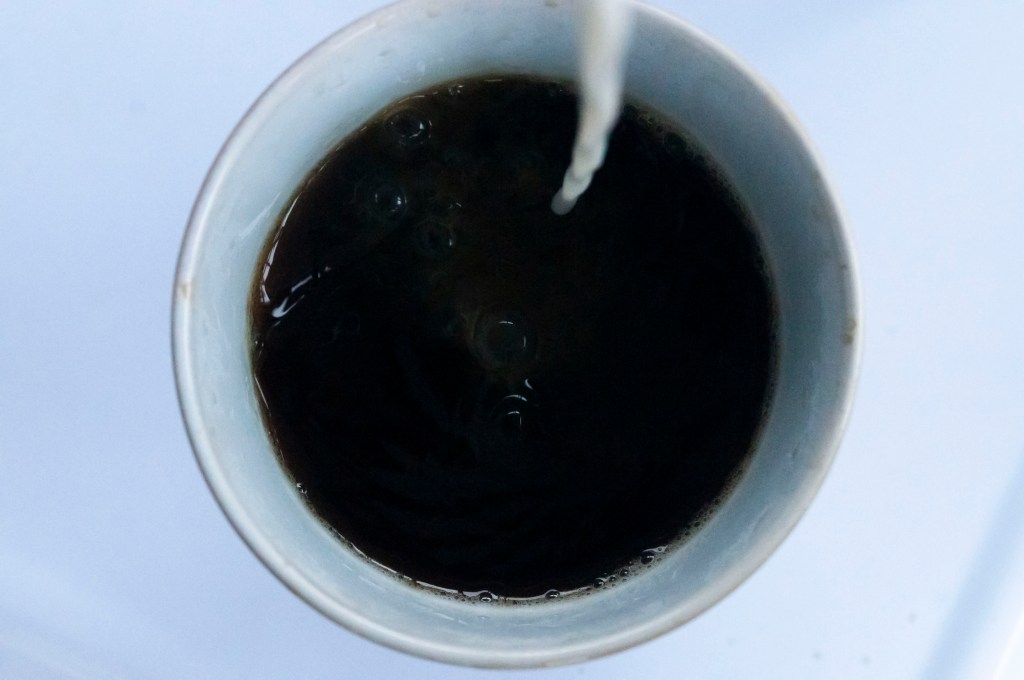
1/500 sec; f/16; ISO 6400
A shutter speed of 1/500 captures the small splash of liquid, showing the forceful impact the milk had on the coffee after being poured from a height of 15 centimetres (see Fig. 9). If the milk were poured gently from a reasonable height, there would be fewer droplets, little to no splashes and as a result, wouldn’t create such an intense surface tension. While the majority of the shot is crisp, there is some motion blur just below the droplets and surrounding the crown of liquid, therefore does not freeze the action in its entirety and proves that a faster shutter speed is more appropriate for this experiment.

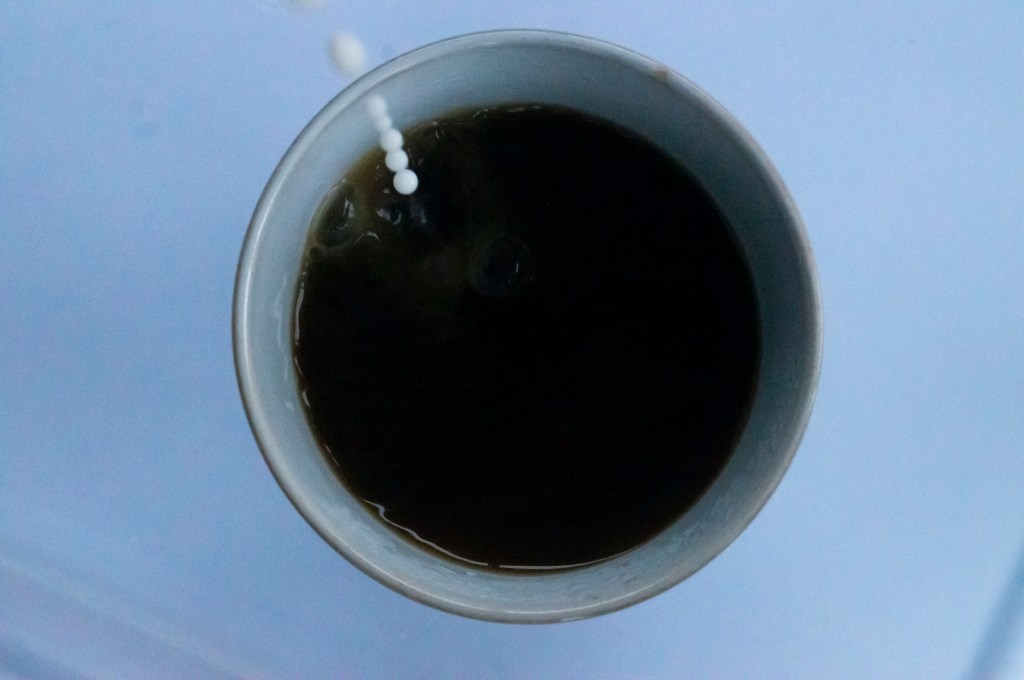
1/640 sec; f/13; ISO 6400
The water droplets in this image (see Fig. 10) are seen to be connected with thinner links of liquid in between each sphere, showing how a stream of water isn’t always as smooth as the naked eye would see. Each droplet is a different shape and warps from the gravity and height of the kettle compared to the cup. Once again, the shot isn’t entirely crisp due to some motion blur surrounding the water, however, is slightly better than the previous image and as a result, shows how small changes in shutter speed can affect the result of a shot significantly.
1/800 sec; f/9; ISO 6400
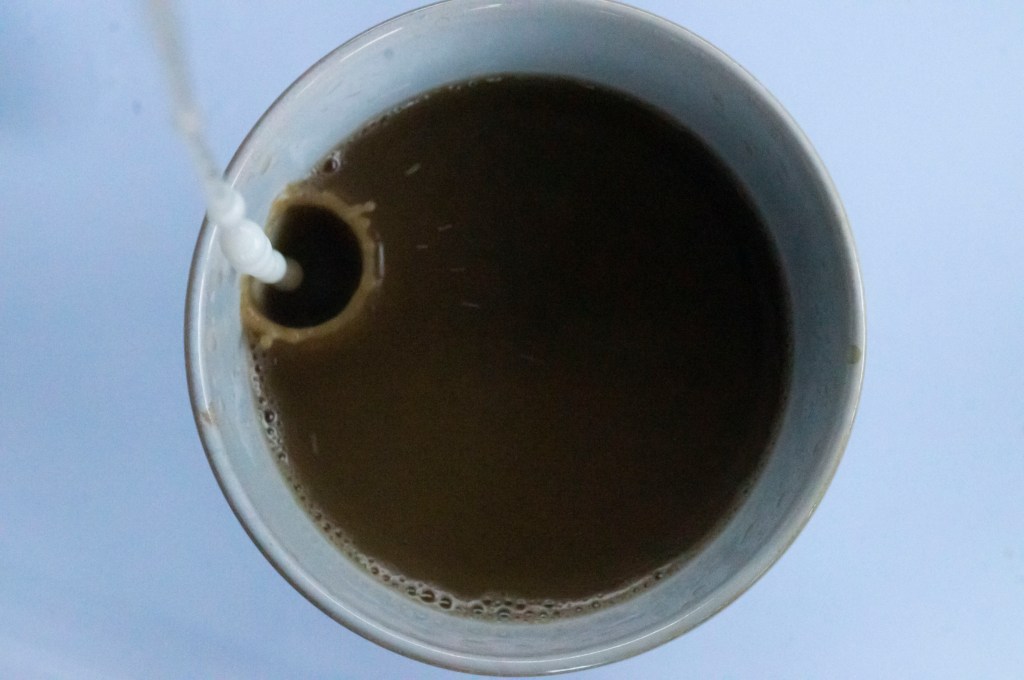
Using a shutter speed of 1/800 enabled me to capture a much smoother stream of milk (see Fig. 11), as opposed to heavy droplets of liquid as seen in previous images which were interesting to see, as this is a more accurate visual of what we would see in the flesh. Due to the shallow depth of field, however, the flow isn’t as sharp and shows the downside of using a faster shutter speed at this particular angle as the aperture becomes wider to allow more light in, yet reduces the area of focus and distorts the shot. Despite this, we can focus on the small ripples created in the coffee not seen in previous shots as the imagery wasn’t as clear as this, allowing the viewer to discover a whole new layer of movement.
1/1000 sec; f/10; ISO 6400
Comparing this image (see Fig. 12) to the first example shows how vital shutter speed can be when it comes to freezing movement as the droplets are precise, crisp and utterly void of motion blur. However, once again, the shallow depth of field prevents an entirely in-focus shot. Due to a wider aperture, the exposure is brighter than previous shots and has reduced the grain created by the ISO. While the earlier settings did capture movement that would be difficult to see clearly with the naked eye, it is clear to see that shutter speeds above 1000 are the most successful if you want to completely freeze the most minute of moments in it’s sharpest form.
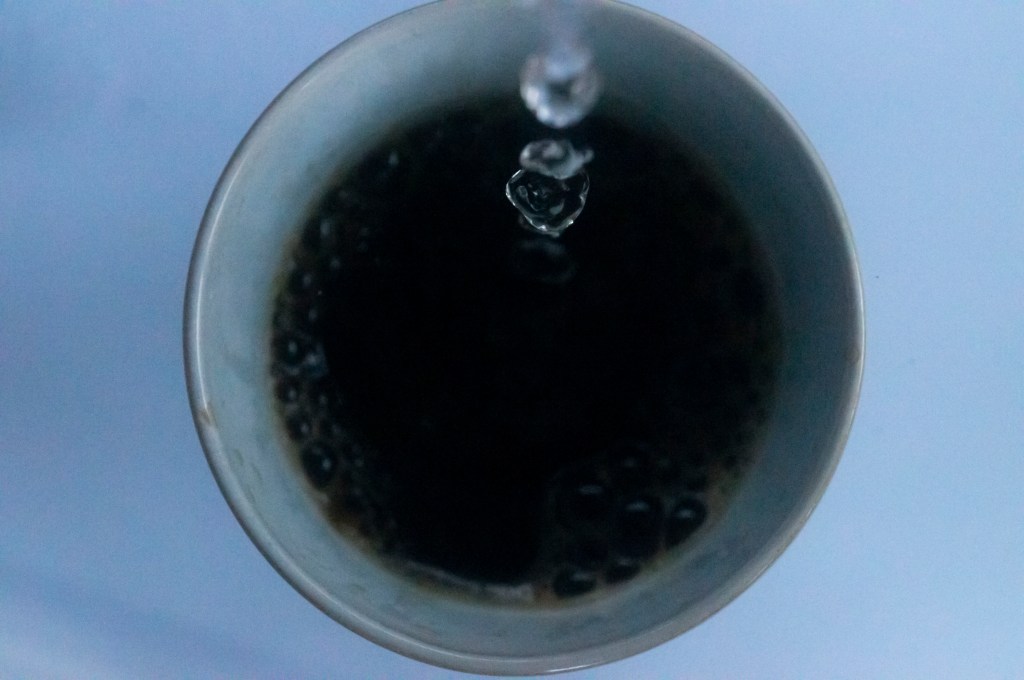
1/2000 sec; f/7.1; ISO 6400
Even though the shallow depth of field has once again prevented the image from being fully in focus, it enhances the details we can see and directs our eyes towards the clear droplets mid-frame (see Fig. 13). Instead of a frozen sphere, the camera has managed to capture the water breaking and flattening due to gravity which we wouldn’t usually see without slow-motion technology or fast shutter speeds. After reviewing the whole shoot, this is the most prominent and unique as the physics of the water has been visibly documented, which is fascinating.
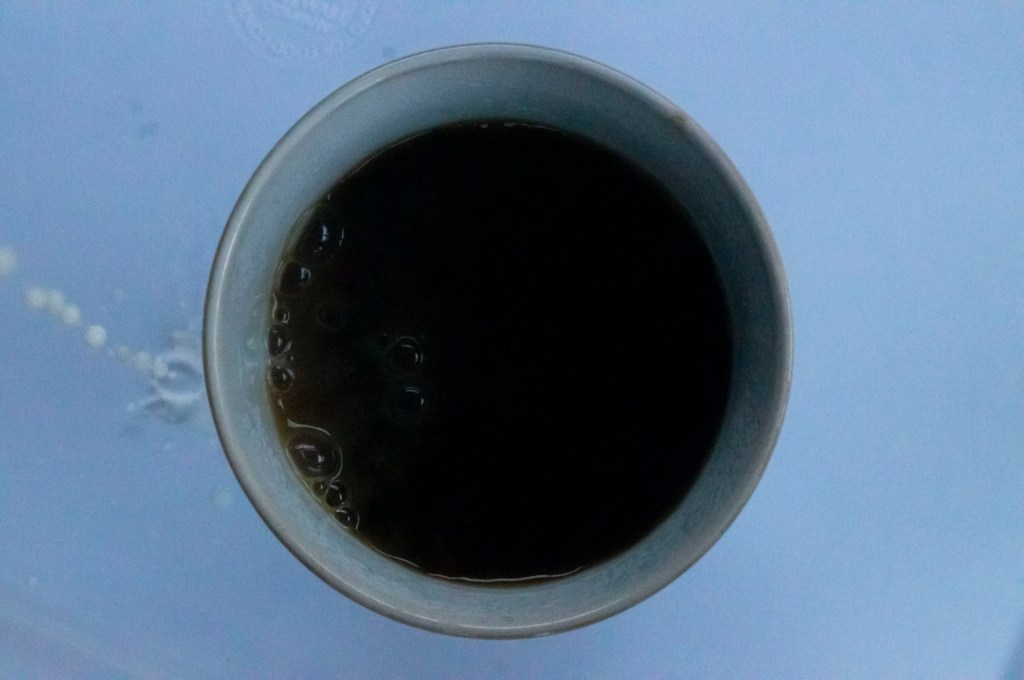
1/1000 sec; f/11; ISO 6400
This example (see Fig. 14) is more of an ‘outtake’ than anything else, however was an image I wanted to include to reflect back on the idea of fragmenting time. Due to the height of the milk jug, it was extremely difficult to keep the liquid pouring in one fluid stream especially as it began to run out, causing the milk to break in flow and splash down the side of the cup. This event isn’t something that the viewer would’ve seen if not included in this set, therefore is a slice of time that could remove context from the shooting process.
Reflection
Despite my apprehension at the start of this exercise, these images have helped me to understand both the importance and impact of shutter speeds, how time can be frozen, and we can discover the most minute details because of it.
There is only so much you can see with the naked eye that if you blink, you can miss the most spectacular moments created in milliseconds, yet we can freeze and keep these moments forever with just a click of a button. Capturing these moving subjects help challenge the viewer’s perception of movement and all of the elements that make up one constant motion, as well as being able to admire the beauty of a frozen moment and its intricacies.
It is fascinating to see the individual phases of event and the small details we can discover within, that we may not have noticed before.
References:
Bloomfield, R., 2018. Photography 1: Expressing your Vision. 4th ed. [pdf] Barnsley: OCA, p. 61. Available at: https://www.oca-student.com/course/photography-1-expressing-your-vision [Accessed 16 March 2020].
List of images:
Figure. 1. Powell, L. (2020) Contact sheet 1 [scanned document] In possession of: Lauren Powell: Eastleigh.
Figure. 2. Powell, L. (2020) Contact sheet 2 [scanned document] In possession of: Lauren Powell: Eastleigh.
Figure. 3. Powell, L. (2020) Contact sheet 3 [scanned document] In possession of: Lauren Powell: Eastleigh.
Figure. 4. Powell, L. (2020) Contact sheet 4 [scanned document] In possession of: Lauren Powell: Eastleigh.
Figure. 5. Powell, L. (2020) Contact sheet 5 [scanned document] In possession of: Lauren Powell: Eastleigh.
Figure. 6. Powell, L. (2020) Contact sheet 6 [scanned document] In possession of: Lauren Powell: Eastleigh.
Figure. 7. Powell, L. (2020) Contact sheet 7 [scanned document] In possession of: Lauren Powell: Eastleigh.
Figure. 8. Powell, L. (2020) Contact sheet 8 [scanned document] In possession of: Lauren Powell: Eastleigh.
Figure. 9. Powell, L. (2020) Freeze 1 [image] In possession of: Lauren Powell: Eastleigh.
Figure. 10. Powell, L. (2020) Freeze 2 [image] In possession of: Lauren Powell: Eastleigh.
Figure. 11. Powell, L. (2020) Freeze 3 [image] In possession of: Lauren Powell: Eastleigh.
Figure. 12. Powell, L. (2020) Freeze 4 [image] In possession of: Lauren Powell: Eastleigh.
Figure. 13. Powell, L. (2020) Freeze 5 [image] In possession of: Lauren Powell: Eastleigh.
Figure. 14. Powell, L. (2020) Freeze 6 [image] In possession of: Lauren Powell: Eastleigh.
