
Summary:
In this exercise I;
– Documented the camera and lens type, along with the settings used.
– Explained the process taken to take these images, the use of direct sunlight and the difficulties faced.
– Briefly analysed the various shots to compare the differences in background, depth of field and distortion.
– Reflected on the difficulty of remembering the difference between long and short focal length, how I handled this and noted the contrasts between the two compositions.
Brief
‘Select your longest focal length and compose a portrait shot fairly tightly within the frame in front of a background with depth. Take one photograph. Then walk towards your subject while zooming out to your shortest focal length. Take care to frame the subject in precisely the same way in the viewfinder and take a second shot. Compare the two images and make notes in your learning log.‘ (Bloomfield, 2018)
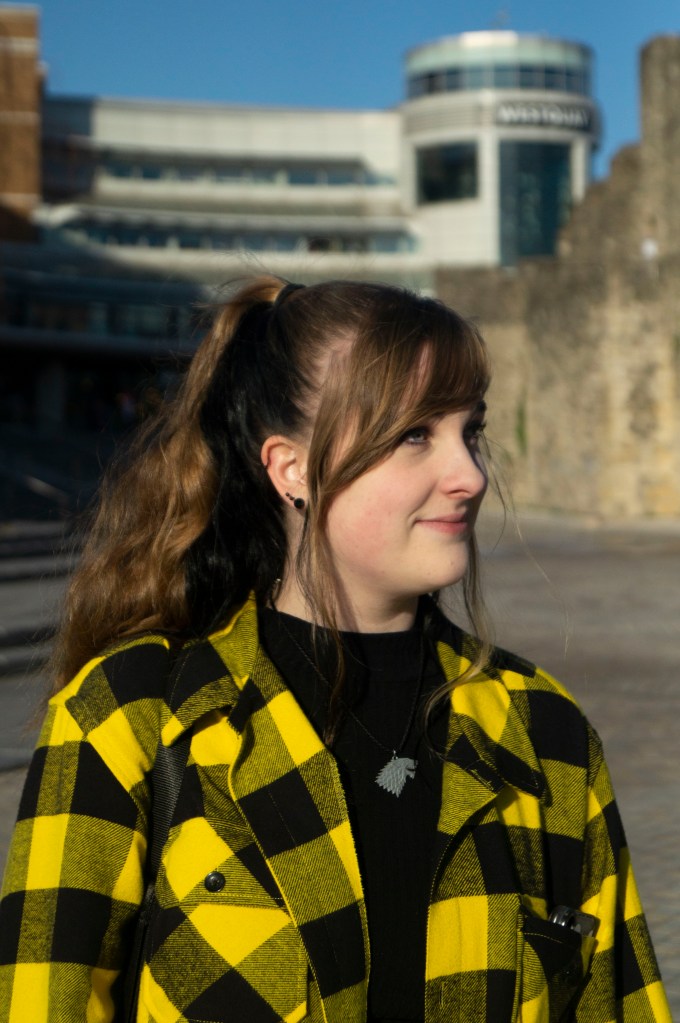
Fig. 1. Viewpoint 1 (2020)
1/4000 sec; f/5.6; ISO 400; 55mm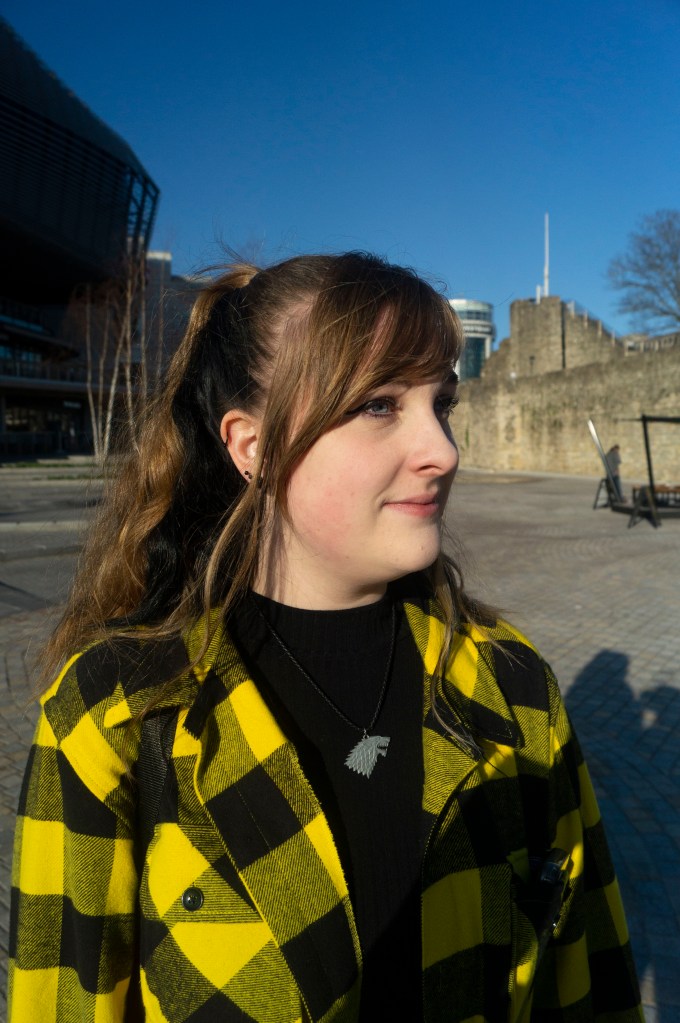
Fig. 2. Viewpoint 2 (2020)
1/4000 sec; f/5.6; ISO 400; 18mm
Just like the previous exercise, I used a SONY A57 with the SONY 18-55mm 3.5-5.6 SAM lens, set the aperture to a wide aperture of f/5.6 to provide a subtle blur behind the model and kept the camera on manual focus to avoid relying on autofocus for a crisp image.
These images were taken in direct sunlight, as all other areas of the town were too dark to capture a crisp portrait, which is why my model is looking sideways rather than forwards. While I preferred the eyes facing the lens, we had to consider eye safety first.
For Viewpoint 1 (see Fig. 1), I zoomed the lens all the way in at 55mm, standing roughly a metre or so away from the model and making sure her upper torso fit tightly within the frame. The background is close yet soft and out of focus, assuring that the person in the frame is the primary focus with minimal distractions from the surroundings. The wall subtly frames the model and doesn’t “cut” through her head. You can see that the image is at eye level, not from above or below, meaning the models face isn’t warped in any way.
For Viewpoint 2 (see Fig. 2), I zoomed out to 18mm and had to stand extremely close to the model to frame the image as accurately as I could to match the previous shot. Despite the wide aperture, the background is much clearer and more in focus than its partner. The buildings are much further away, showing even more of the wall to the right and featuring a whole new building to the left. Unlike the first image, this shot looks as if it has been shot from a lower angle and has distorted the models face in a way a fisheye lens would.
Reflection:
It was difficult for me to actively remember the difference between long and short focal length while taking these images. Usually, I refer to it as zooming in or out. Therefore, I noted that longest = the large number, shortest = the smaller number. These exercises are helping me to push my technical knowledge even further, which is helpful when it comes to comparing the imagery.
The differences between the two images are immense, which I wasn’t expecting even after looking at the example images provided with the brief. It was intriguing to see how small changes can impact the subject and its surroundings in a way that results in two opposing shots.
Hopefully, this experience will challenge me to be more aware of my camera settings and the viewpoint I take an image from, experimenting a little if initially they don’t work out or look ‘right’.
References:
Bloomfield, R., 2018. Photography 1: Expressing your Vision. 4th ed. [pdf] Barnsley: OCA, p. 44. Available at: https://www.oca-student.com/course/photography-1-expressing-your-vision [Accessed 22 February 2020].
List of images:
Figure. 1. Powell, L. (2020) Viewpoint 1 [image] In possession of: Lauren Powell: Eastleigh.
Figure. 2. Powell, L. (2020) Viewpoint 2 [image] In possession of: Lauren Powell: Eastleigh.

One thought on “Exercise 2.2 Viewpoint”