
Summary:
– I have analysed the contact sheets provided in the previous post, selected the strongest images and edited them slightly by adjusting the highlights/shadows, cropping and straightening.
– The edited images are provided below in a gallery
– Before the selection was cut down once more to help with the final selection process
– Stating why some images weren’t included, for instance, they weren’t strong enough conceptually or technically
– Unlike the photographs shown in the scanned document, that is highlighted and numbered to show the two attempts at image pairing, the numbers being the final choice.
– Brief bullet points have been listed to cover the strong variety of elements within the final collection and why they were paired together.
I decided to select what I feel we’re the best images from the shoot and edited them very slightly. The only photo manipulation that took place was correcting the highlights and shadows, cropping them down and straightening a few of them out where needed, without completely changing what was captured in the camera which was requested in the ‘Expressing Your Vision’ course material.
The edited images are as follows :
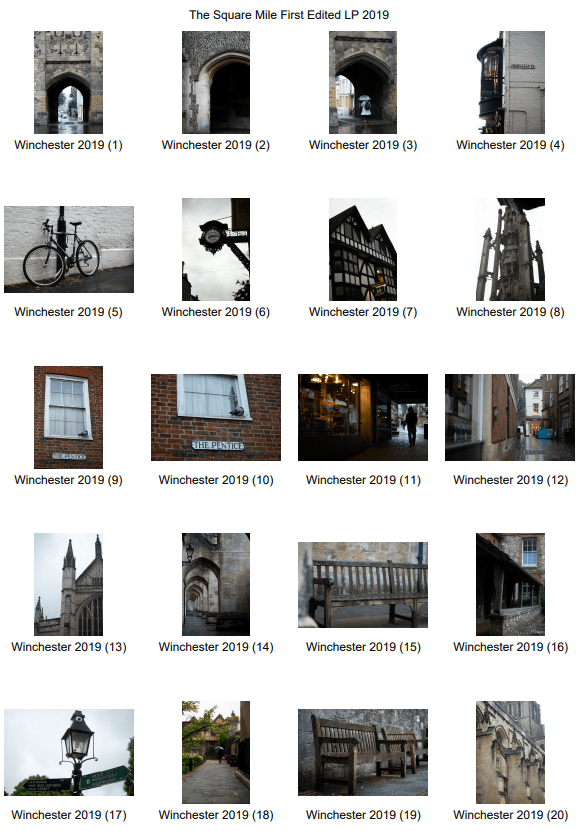
Fig. 1. Page 1 (2019) 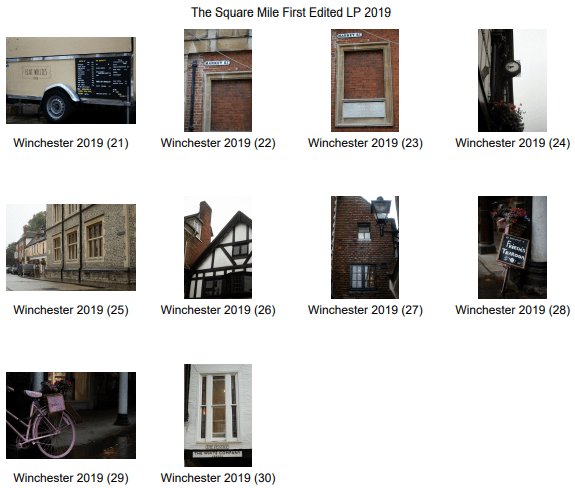
Fig. 2. Page 2 (2019)
After editing these images, I cut down the selection once more to make it easier to choose my final images for the ‘Square Mile’ assignment.
While there were quite a few images that I liked, some of them just didn’t ‘fit’ or have a strong enough link to the project plan, where I stated that ‘I would like to explore various childhood memories, see how the areas may have changed throughout the years and if they are as I remember them’ (Powell, 2019).
For example, ‘Winchester 2019 28′ (see Fig. 2.) is strong due to composition, the relaxed position of the bike, the highlights and shadows, as well as the shallow depth of field, however, it didn’t compliment the collection. Considering the majority of the images explored architecture, the differences between each building and the effects time has had on them, it became an odd one out.
The following images are a part of my second selection process. The scans below show my initial pairings in colour and the final image pairings with numbers. I will provide a brief list as to why I decided to pair up these specific images, to refer back to in my image analysis.
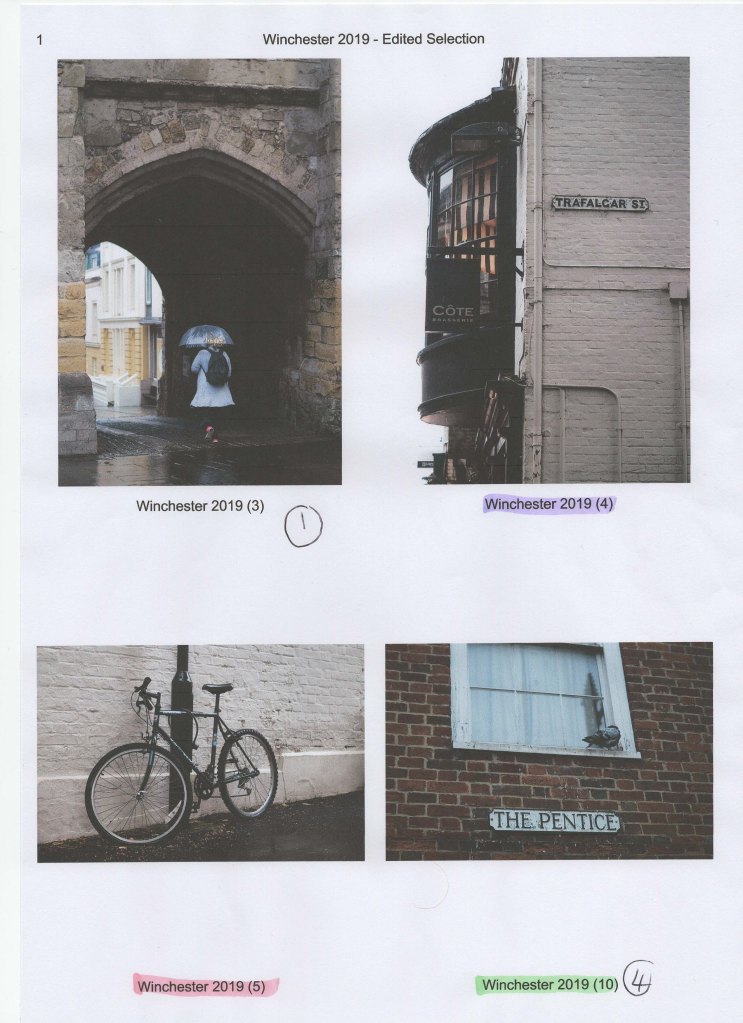
Fig. 3. Contact Sheet (2019) 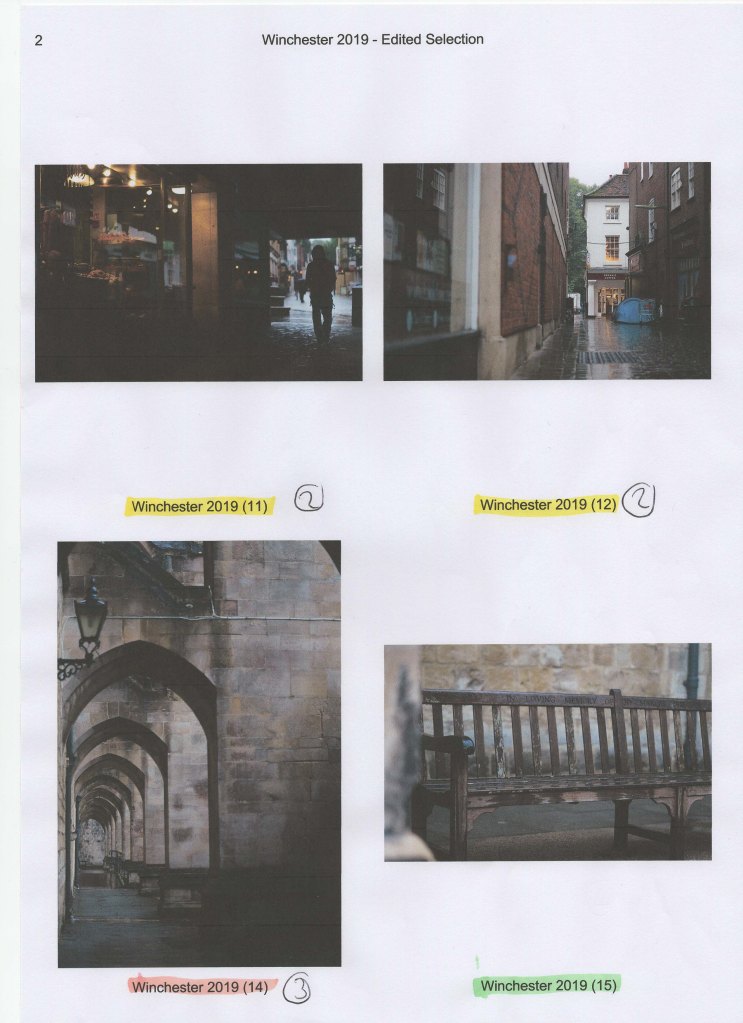
Fig. 4. Contact Sheet 2 (2019) 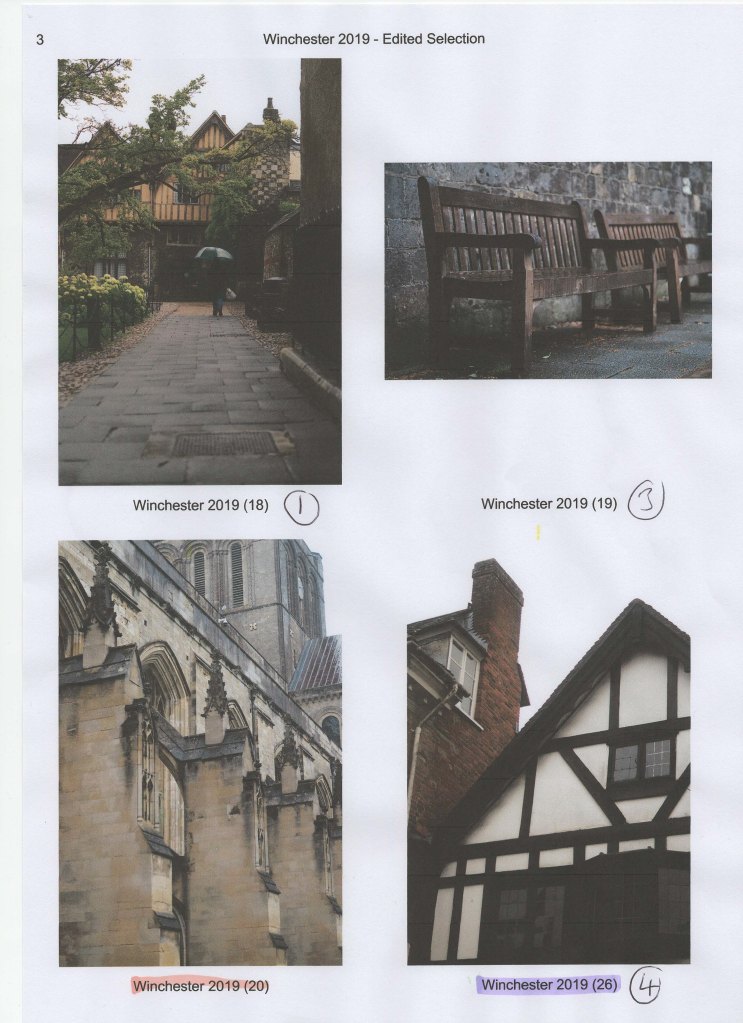
Fig. 5. Contact Sheet 3 (2019) 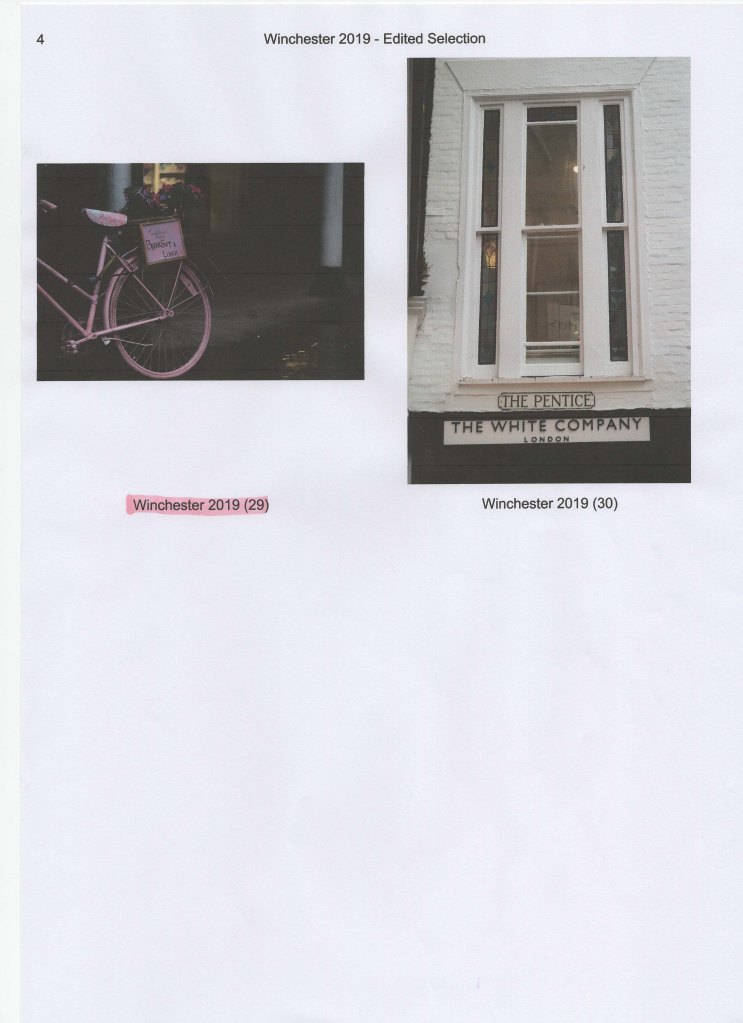
Fig. 6. Contact Sheet 4 (2019)
Reasons for pairing up:
While I am aware I didn’t have to pair these images up, to create a cohesive series I felt that it was the best option for me to make sure I achieved what I set out to do, which was to explore Winchester by retracing steps, capturing what had changed, the similarities and presenting a personal view in a different way to which I’m used to. Pairing the photos up has helped me form a short journey through the town, as well as a complementary collection.
Winchester 11 and 12
– Similar compositions.
– Contrasts between light and dark.
– Contrasts between natural and artificial light.
– References to work and daily life.
– Shows human interaction.
– Both significant places I visited with family.
Winchester 14 and 19
– Similar tones.
– Repetition.
– The juxtaposition between architecture and public seating.
– Both in the same area and have a significant connection.
Winchester 3 and 18
– Person framed by architecture and nature.
– Umbrellas.
– Shows daily life.
– Monochrome.
– Pathways.
– Start and end of my journey.
– Special areas vs new.
Winchester 10 and 26
– Similar brickwork.
– Nature vs man-made.
– Similar tones.
– Contrasts in colour.
– Reflection of a significant statue.
– Depth.
– Dirty buildings.
– Buildings are behind one another.
– Family links.
References :
Powell, L. (2019) Plan for ‘The Square Mile’. [online] Available at: https://laurenpowelloca.photo.blog/2019/08/20/plan-for-the-square-mile/ [Accessed 12 September 2019].
List of images:
Figure 1. Powell, L. (2019) Page 1 [PDF, Screenshot] In possession of: Lauren Powell: Eastleigh.
Figure 2. Powell, L. (2019) Page 2 [PDF, Screenshot] In possession of: Lauren Powell: Eastleigh.
Figure 3. Powell, L. (2019) Contact sheet 1 [Scanned Document] In possession of: Lauren Powell: Eastleigh.
Figure 4. Powell, L. (2019) Contact sheet 2 [Scanned Document] In possession of: Lauren Powell: Eastleigh.
Figure 5. Powell, L. (2019) Contact sheet 3 [Scanned Document] In possession of: Lauren Powell: Eastleigh.
Figure 6. Powell, L. (2019) Contact sheet 4 [Scanned Document] In possession of: Lauren Powell: Eastleigh.
